Trees
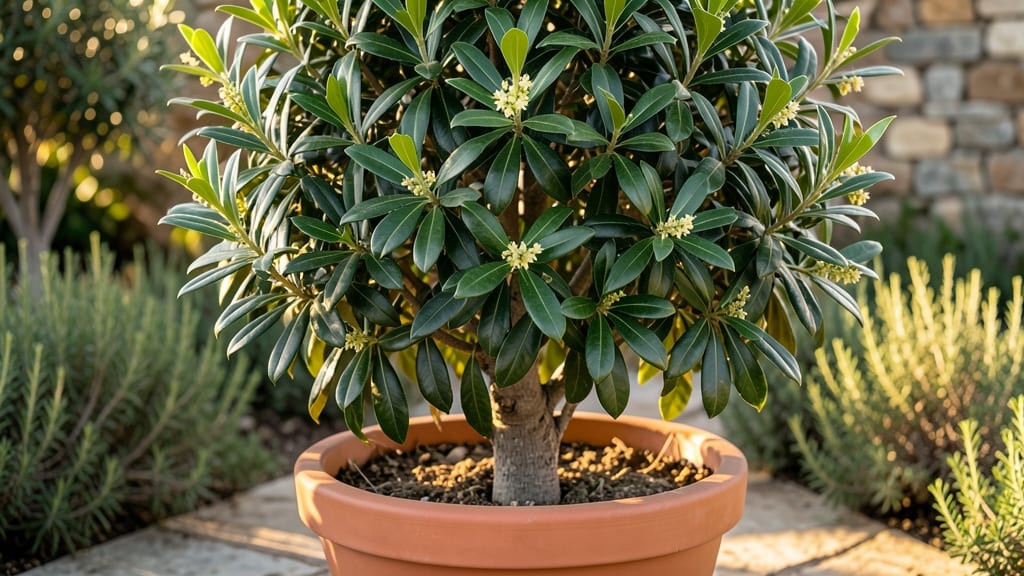
Growing bay leaf trees from seed to fragrant foliage is easier than you think. 🌿 These cold-hardy perennials thrive in zones 7-10, offering year-round leaves perfect for cooking or ornamental use. My first tree took just three years to reach harvestable size—far faster than I expected.
The secret lies in rich, well-draining soil and morning sunlight, though they tolerate partial shade. Container growing works beautifully too, letting you move the plant indoors during winter. Prune lightly in late winter to encourage bushier growth, and avoid heavy cuts that stress the tree.
By autumn, you'll harvest glossy, aromatic leaves for soups, stews, and potpourri. The scent alone makes them worth growing—imagine fresh bay leaves anytime, not just from the grocery store. Even in colder climates, these trees reward patience with lush, evergreen beauty.
Whether you plant in-ground or in pots, bay leaf trees bring both kitchen and garden value. Start small, and watch your harvest grow year after year.
📚 In This Guide
- What you need
- Instructions
- Tips and common mistakes
- Wrapping up and next steps
What you need
- ● Bay leaf tree: 1–3 Laurus nobilis plants (nursery-grown saplings for faster results) or seeds (slower but fun!)
- ○ Optional: Pre-pruned dwarf varieties (e.g., 'Angustifolia') for smaller spaces
- ● Soil: 5–10 gallons of well-draining, slightly acidic soil (pH 5.0–7.0)
- ● 1 part peat moss or compost + 2 parts garden soil (mix for optimal aeration)
- ● Container (if growing in pots): 1–2 15–20 gallon pots with drainage holes (terracotta or fabric grow bags work best)
- ○ Optional: Self-watering pots for low-maintenance care
- ● Tools: 1 pruning shears (sterilized with rubbing alcohol)
- ● 1 trowel or spade (for transplanting)
- ● 1 garden hose or watering can (with a fine rose nozzle)
- ● 1 mulch (2–3 inches of wood chips or straw to retain moisture)
- ● Climate: USDA Zones 7–10 (cold-hardy to 15°F; protect young trees in colder zones with burlap wraps or frost cloth).
- ● Sunlight: Full sun to partial shade (6+ hours of sunlight daily for best growth).
- ● Water: Consistent moisture (water deeply 2–3 times per week; drought-tolerant once established).
- ● Space: 6–12 feet of horizontal spread (dwarf varieties need ~3–4 feet).
Step-by-Step guide to growing cold-hardy bay leaf trees
Here's how to cultivate fragrant, evergreen bay leaf trees that thrive year-round in your garden.
🌱 Step 1: Choose the Right Location and Planting Time
Bay leaf trees love full sun to partial shade, with at least 6 hours of sunlight daily. I always plant mine in late spring after the last frost date, when the soil has warmed to 60°F or higher. This gives the roots time to establish before winter.
Pick a spot with well-draining soil—bay trees hate soggy roots. If your soil is heavy clay, mix in 2-3 inches of compost to improve drainage. You'll know you've chosen well when the leaves stay vibrant even in winter's chill.
🪴 Step 2: Dig and Prepare the Planting Hole
Dig a hole twice as wide as the root ball but no deeper. This encourages roots to spread outward rather than settling too low. Gently loosen the roots if they're circling the container—bay trees dislike being root-bound.
Place the tree in the hole so the top of the root ball sits 1 inch above ground level. Fill around the roots with native soil, pressing lightly to remove air pockets. Water deeply to settle everything—you'll see the soil surface sink slightly as it absorbs moisture.
☀️ Step 3: Water and Mulch for Establishment
Water the newly planted tree 1-2 times weekly for the first 4-6 weeks, keeping the soil consistently moist but never soggy. You'll know it's right when the top inch feels damp but not waterlogged.
Apply a 3-inch layer of mulch around the base, keeping it 6 inches away from the trunk to prevent rot. I use shredded bark mulch because it breaks down slowly and retains moisture. This layer protects roots from temperature swings and keeps weeds at bay.
✂️ Step 4: Prune for Shape and Health
Prune in late winter or early spring before new growth starts. Remove any dead, diseased, or crossing branches first—bay trees reward you with glossy new leaves when you keep them tidy. Cut back to just above a leaf node or outward-facing bud.
Shape the tree by thinning out crowded branches to improve airflow. You'll notice healthier foliage and fewer pests when the center stays open. Never remove more than 25% of the tree's foliage in one season—bay trees are slow to recover from heavy pruning.
🌿 Step 5: Maintain Through the Seasons
Fertilize in early spring with a balanced 10-10-10 fertilizer, applying half the recommended dose. Bay trees are light feeders—too much fertilizer leads to rapid but weak growth. Water deeply after fertilizing to help nutrients reach the roots.
Watch for signs of stress like yellowing leaves or leaf drop. These usually mean either too much sun (especially in hot climates) or inconsistent watering. Adjust your care based on what you see—bay trees are forgiving once they're established.
Tips & tricks for perfect bay leaf tree cultivation
These practical insights will help your bay leaf trees thrive year-round without the common growing headaches.
Sunlight Strategy: While bay leaf trees tolerate partial shade, the 6 hours of sunlight daily mentioned in Step 1 is non-negotiable for optimal growth. In hot climates, afternoon shade prevents leaf scorch while maintaining vibrant foliage. I've seen trees in full sun develop crispier leaves perfect for culinary use—ideal if you plan to harvest for cooking.
Soil Preparation Insight: The 2-3 inches of compost recommendation in Step 1 is especially crucial if your soil tests below 6.0 pH. Bay trees prefer slightly acidic to neutral soil. Mix in a handful of sulfur if needed—this small adjustment prevents nutrient deficiencies that cause yellowing leaves. A soil test kit costs pennies and saves you from guessing.
Watering Wisdom: The initial 1-2 times weekly watering schedule in Step 3 should shift to once weekly after the first 6 weeks once roots establish. Stick your finger in the soil—if the top inch feels dry, it's time to water. Overwatering is the #1 killer of young bay trees, causing root rot that's nearly impossible to reverse.
Pruning Precision: When shaping your tree in Step 4, focus on creating an open center that allows air circulation. I like to remove branches that grow inward first—they compete for sunlight and create dense, pest-prone areas. Remember the 25% foliage limit rule: heavy pruning stresses these slow-growing trees, especially in their first few years.
Pro Tips for Bay Leaf Trees
- These practical insights will help your bay leaf trees thrive year-round without the common growing headaches.
- Sunlight Strategy: While bay leaf trees tolerate partial shade, the 6 hours of sunlight daily mentioned in Step 1 is ...
- Soil Preparation Insight: The 2-3 inches of compost recommendation in Step 1 is especially crucial if your soil tests...
Frequently asked questions
Got questions about growing and caring for bay leaf trees? Here are some of the most common ones—and their answers—to help you cultivate a thriving, fragrant perennial!
Can bay leaf trees survive winter in cold climates?
Most bay leaf trees (Laurus nobilis) are tender perennials and struggle in temperatures below 15–20°F. However, some cold-hardy varieties (like Umbellularia californica, California bay) can tolerate 10°F with proper mulching. In freezing zones, grow them in containers and move them indoors or wrap the trunk for protection.
How fast do bay leaf trees grow, and when can I harvest leaves?
Bay leaf trees grow 12–24 inches per year under ideal conditions. You can harvest leaves anytime after 1–2 years, but avoid taking more than 1/3 of the foliage at once to encourage regrowth. Young leaves are the most flavorful—pick them before they fully mature for the best culinary quality!
Why are my bay leaf tree’s leaves turning yellow or dropping?
Yellowing or dropping leaves usually signal overwatering, underwatering, or nutrient deficiencies. Check the soil—it should stay moist but well-draining. Yellow edges may mean low humidity (mist leaves occasionally), while brown spots could indicate fungal issues (prune affected areas and improve airflow).
Can I grow a bay leaf tree in a pot, or does it need a garden bed?
Yes! Bay leaf trees thrive in large containers (15+ gallons) with drainage holes. Use a well-draining potting mix and repot every 2–3 years. Place pots in full sun to partial shade and move them indoors when temperatures drop below 50°F at night. Potted trees are perfect for patios or kitchens!
Are there non-toxic alternatives to true bay leaves for cooking?
If you’re concerned about toxicity (bay leaves are non-toxic in food-safe amounts but can cause stomach upset if overconsumed), try California bay (pepperwood), sweet bay substitutes, or culinary herbs like oregano, thyme, or rosemary. For a similar flavor, cinnamon or allspice can add warmth to dishes—just adjust ratios!
Wrapping up and next steps
Growing bay leaf trees is a rewarding journey that brings fragrant beauty to your garden year-round! 🌿 Whether you're drawn to their evergreen foliage, culinary uses, or low-maintenance charm, these cold-hardy trees are a fantastic addition.
With the right care—sunlight, well-draining soil, and patience—they’ll thrive and reward you with lush, aromatic leaves for cooking, crafts, or simply enjoying nature’s scent.
Ready to plant your own? Start by selecting a healthy sapling (or seed!) and follow the steps above. Soon, you’ll be harvesting fresh bay leaves straight from your backyard—how’s that for self-sufficiency? Happy gardening! 🌱