
Trees
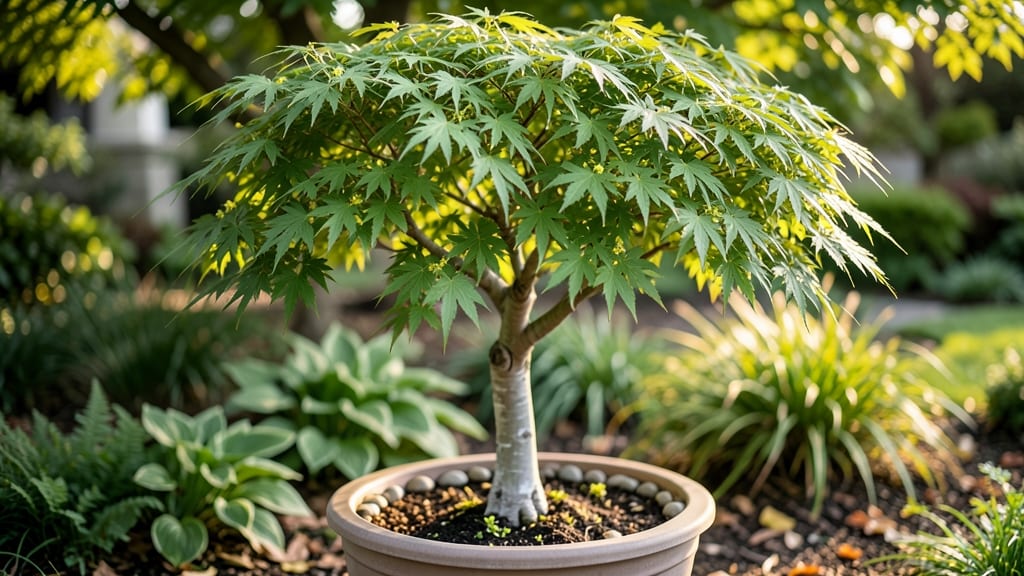
Your split leaf maple (Acer palmatum 'Dissectum') will reward you with shockingly delicate foliage that looks like lace—if you give it the right conditions. 🌿 I’ve watched mine transform from bare branches in winter to a velvety green cascade by spring, and the secret isn’t complicated: it’s all about sunlight and soil.
Too much shade, and those signature leaves turn sparse; too much heat, and the edges scorch. But get it right, and you’ll have a tree that’s the star of your garden for decades.
Start with morning sun and afternoon shade—think dappled light under a canopy, not blazing midday rays. The soil needs to be well-draining but moisture-retentive, like a mix of garden soil, compost, and a handful of perlite.
Plant in spring or early fall when temps are mild, and space saplings 10–15 feet apart to give their roots room to stretch. Mulch heavily to keep roots cool and hydrated, but avoid piling it against the trunk—this tree hates soggy feet.
Pruning isn’t just about shaping; it’s about preserving that airy silhouette. Trim back leggy growth in late winter or early spring before new leaves emerge, and remove any dead or crossing branches. The goal?
Keep the tree’s natural open, weeping habit intact—this is what makes split leaf maples so stunning. With the right care, you’ll see brilliant red or orange foliage in fall, and even winter interest from peeling bark. It’s a tree that pays you back in beauty every season.
Here’s the thing about split leaf maples: they’re dramatic but delicate. Scale back on fertilizer—they thrive on neglect once established—and watch for spider mites in dry spells (a gentle spray of water usually clears them).
With these basics, you’ll have a tree that’s neighbor-jealousy levels of gorgeous, not just another pretty face in the garden. Let’s get growing!
📚 In This Guide
- What you need
- Instructions
- Tips and common mistakes
- Wrapping up and next steps
What you need
- ● Split leaf maple plant: 1 healthy sapling (3–5 gallons in a container) or bare-root specimen (available at nurseries or online).
- ● Well-draining potting mix: 1 bag (1–2 cubic feet) of high-quality acidic soil (pH 5.0–6.5). Mix with 50% perlite or orchid bark for aeration.
- ● Container (if potted): 1 terracotta or fabric pot (12–18 inches in diameter) with drainage holes.
- ● Mulch: 2–3 inches of organic mulch (e.g., shredded bark or pine needles) to retain moisture.
- ● Garden trowel or shovel (for planting).
- ● Pruning shears (sterilized with rubbing alcohol).
- ● Watering can or hose with a gentle spray nozzle.
- ● Gloves (to protect hands from thorns and soil).
- ○ Fertilizer (optional): 1 bag of balanced, slow-release fertilizer (10-10-10 or acidic tree fertilizer).
- ○ Support stake (optional): 1 bamboo or metal stake (for young trees in windy areas).
Step-by-step instructions for planting and caring for a split leaf maple
Here’s how to get your split leaf maple thriving—with the right light, soil, and a few key tricks.
🌱 Step 1: Choose the Perfect Planting Spot
Split leaf maples (Acer palmatum dissectum) love full sun to partial shade, ideally 6+ hours of direct sunlight daily. I always pick a spot with morning sun and afternoon shade—this prevents leaf scorch while keeping the foliage vibrant. Avoid deep shade, or your tree will grow leggy and sparse.
Check the area’s wind exposure too. While they’re tough once established, young trees need shelter from strong winds. If your yard is open, plant near a fence or wall for natural protection. Dig a hole twice as wide as the root ball but only as deep—planting too deep suffocates roots and causes stress.
🌿 Step 2: Amend the Soil for Healthy Growth
Split leaf maples prefer well-draining, slightly acidic soil (pH 5.5–6.5). If your soil is heavy clay, mix in 2–3 inches of organic matter (like compost or leaf mold) to improve drainage. I avoid amending with sand—it can make soil too coarse and dry.
Test the soil moisture before planting. Stick your finger 2 inches deep—if it’s bone-dry, water the hole thoroughly before placing the tree. The root ball should stay moist but not soggy. Once planted, water deeply again to settle the soil and eliminate air pockets around the roots.
☀️ Step 3: Plant and Mulch for Long-Term Care
Gently remove the tree from its container and loosen any circling roots with your fingers. Place it in the hole so the top of the root ball sits level with the ground—never bury the trunk. Backfill with native soil, tamping lightly every 2 inches to remove air gaps.
Spread 2–3 inches of mulch (wood chips or shredded bark) over the root zone, keeping it 6 inches away from the trunk. Mulch retains moisture and regulates soil temperature, but too much can smother roots. Water again until the soil 1 inch down feels damp—this encourages strong root establishment.
💧 Step 4: Water and Fertilize for Lush Foliage
Water deeply once a week (or more in extreme heat) to encourage deep root growth. Shallow watering leads to weak roots and stunted growth. You’ll know it’s time to water when the top 2 inches of soil feel dry. Avoid wetting the leaves—this can cause fungal issues.
Fertilize lightly in early spring with a balanced, slow-release fertilizer (10-10-10 or similar). Over-fertilizing burns roots and causes leaf burn. Split leaf maples are low-maintenance—too much nitrogen leads to excessive leaf growth at the expense of vibrant color. A light feeding once a year keeps them healthy without stress.
✂️ Step 5: Prune and Protect for Year-Round Beauty
Prune in late winter or early spring before new growth starts. Remove dead, crossing, or weak branches at the base of the branch collar (the swollen area where the branch meets the trunk). Never leave stubs—this invites disease. Thin out crowded branches to improve airflow and reduce pest risks.
Watch for aphids or spider mites on new growth. A strong spray of water usually dislodges them, but severe infestations need neem oil or insecticidal soap. Split leaf maples are generally pest-resistant, but stress (from poor soil or drought) makes them vulnerable. Keep an eye out for yellowing leaves—this often signals overwatering or root rot.
Tips & tricks for perfect split leaf maple care
Here's what nobody tells you about growing these stunning trees—tricks that'll make all the difference between a struggling sapling and a showstopping landscape feature.
Lighting Strategy: If your yard only gets partial sun, position your split leaf maple to catch the brightest hours of the day. I've seen them thrive with as little as 4 hours of direct sun, but the foliage will be more vibrant with that full 6+ hours. Watch for leaf edges turning brown—that's your sign to move it to a sunnier spot or provide afternoon shade with a sheer curtain during peak summer heat.
Soil Preparation Secret: The 2-3 inches of organic matter we add isn't just about drainage—it's about creating the perfect microbial environment. I like to mix in a handful of worm castings with the compost; they introduce beneficial bacteria that help the roots establish faster. For clay soil, work the organic matter down to at least 6 inches deep where the roots will grow.
Planting Depth Caution: I can't stress this enough: planting too deep is the #1 mistake I see with new gardeners. The top of the root ball should be level with the surrounding soil—never below it. If you bury the trunk, you'll suffocate the tree and create conditions for rot. A simple trick is to draw a line on the root ball before planting to mark where the soil level should be.
Mulching Technique: When you spread that 2-3 inches of mulch, think of it like putting on a cozy sweater for your tree. But here's the catch: keep it 6 inches away from the trunk to prevent moisture buildup that can cause rot. I like to use cedar mulch—it smells great and naturally repels pests, plus it breaks down slowly to feed the soil over time.
Pro Tips for Split Leaf Maple
- Here's what nobody tells you about growing these stunning trees—tricks that'll make all the difference between a stru...
- Lighting Strategy: If your yard only gets partial sun, position your split leaf maple to catch the brightest hours of...
- Soil Preparation Secret: The 2-3 inches of organic matter we add isn't just about drainage—it's about creating the pe...
Frequently asked questions
Got questions about your split leaf maple (Acer palmatum 'Dissectum')? You’re not alone! Whether you’re a first-time grower or a seasoned gardener, these FAQs will help you keep your tree thriving with stunning, lacy foliage.
How much sunlight does a split leaf maple need?
A split leaf maple thrives in partial shade to full sun, but too much harsh afternoon sun can scorch its delicate leaves. Aim for 4–6 hours of dappled sunlight daily—think morning sun with afternoon shade. If grown in full sun, ensure the soil stays consistently moist to prevent leaf burn.
What’s the best soil mix for a split leaf maple?
This tree loves well-draining, slightly acidic soil (pH 5.0–6.5). Amend heavy clay or sandy soil with compost or peat moss to improve moisture retention and aeration. A mix of 50% garden soil, 30% compost, and 20% perlite works wonders for container or in-ground planting.
Can split leaf maples survive winter?
Yes! These maples are hardy in USDA zones 5–8, but young trees or those in colder zones may need winter protection. Mulch the base with 3–4 inches of organic mulch and wrap the trunk with burlap if temps drop below 10°F. Avoid heavy snow buildup on branches, which can cause breakage.
When and how should I prune my split leaf maple?
Prune in late winter or early spring (before new growth) to shape the tree and remove dead branches. Use sterilized pruners to make clean cuts just above a bud or branch collar. Avoid heavy pruning—these trees have a delicate structure. Pro tip: Prune lightly in summer to encourage bushier growth, but stop by August to avoid stimulating late-season growth vulnerable to frost.
Why are my split leaf maple leaves turning yellow or brown?
Yellowing leaves often signal overwatering or poor drainage, while brown edges can mean underwatering or sunburn. Check the soil moisture—it should stay evenly damp but not soggy. If leaves curl or drop prematurely, your tree may be stressed by heat, pests (like spider mites), or fungal issues (like powdery mildew). Adjust care and treat accordingly.
Are there dwarf varieties of split leaf maple for small gardens?
If space is limited, consider these compact cultivars:
- ‘Bloodgood’ – Grows 12–15 ft tall with deep red foliage.
- ‘Seiryu’ – A stunning dwarf (6–8 ft) with weeping branches and vibrant fall colors.
- ‘Shishigashira’ – A miniature (3–5 ft) with a rounded, moss-like habit.
These varieties make perfect container plants or focal points in small yards!
Wrapping up and next steps
The split leaf maple is a stunning addition to any garden, offering vibrant foliage and year-round interest with minimal fuss! 🌿 With the right balance of sunlight, well-draining soil, and a little patience, you’ll be rewarded with lush, cascading branches that turn fiery in autumn.
Whether you’re a seasoned gardener or just starting out, this tree brings beauty and resilience to your outdoor space.
Ready to transform your landscape? Grab your gloves and head to the nursery—your split leaf maple is waiting to thrive! 🌱