
Pests and Diseases
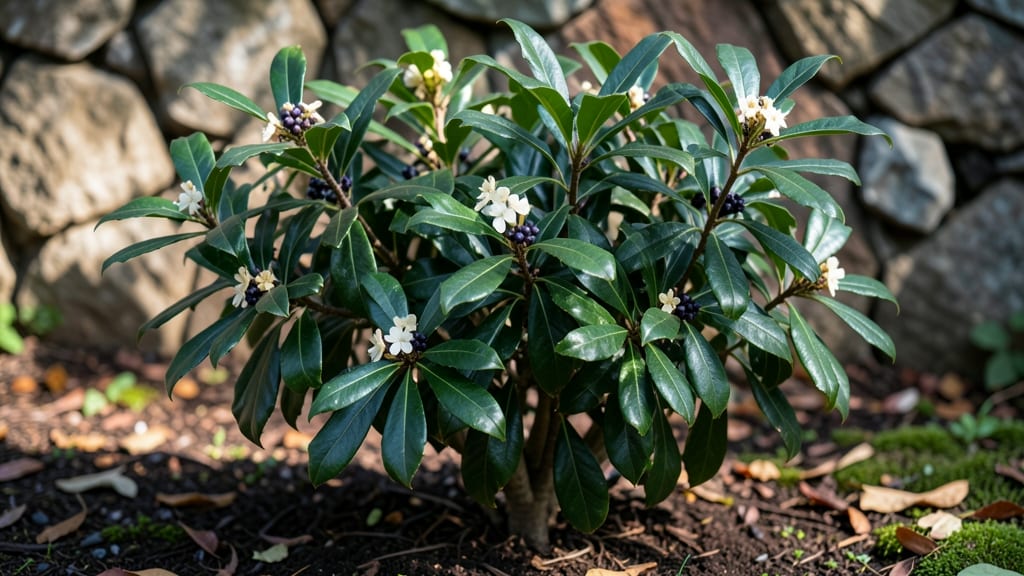
Your bay leaf foliage can go from crispy and sad to vibrant and lush in just a few sprays. 🌿 I’ve nursed back more bay laurel plants than I can count—those brown, brittle edges don’t stand a chance with the right copper spray treatment and a few simple care tweaks.
The secret isn’t complicated: it’s about moisture, light, and catching problems early before they turn your fragrant leaves into paperweights.
Bay laurels thrive in bright, indirect light—whether indoors near a south-facing window or outdoors in partial shade. They hate soggy soil, so let the top inch dry out between waterings, and never let them sit in saucers of standing water.
The moment you see those crispy edges, it’s time to act: copper spray tackles fungal issues while pruning encourages fresh, healthy growth. It’s a two-step fix that works every time.
What you’ll end up with is a thriving, aromatic bush that keeps producing those glossy, fragrant leaves for years. The copper spray doesn’t just stop the damage—it prevents future crisping by creating an unfriendly environment for fungi.
Plus, the plants reward you with that unmistakable bay scent, perfect for cooking or just filling your space with freshness.
Works for both potted plants and garden beds, and the same principles apply whether you’re growing in a sunny kitchen or a shaded patio. Here’s how to bring your bay leaves back to life—no more sad, brittle edges in sight.
📚 In This Guide
- What you need
- Instructions
- Tips and common mistakes
- Wrapping up and next steps
What you need
- ● Dried bay leaves: 1–2 fresh or dried leaves per quart of water (or ~1 tbsp crushed dried leaves for a stronger solution).
- ● Copper fungicide spray: 1–2 tbsp of copper sulfate pentahydrate (or a pre-mixed copper fungicide like Bonide Copper Fungicide). Check for EPA approval for organic gardening if preferred.
- ● Water: 1 gallon (distilled or dechlorinated tap water to avoid chemical residue).
- ● Spray bottle or garden sprayer: 16–32 oz capacity with a fine mist nozzle for even coverage.
- ● Gloves: 1 pair (nitrile or rubber to avoid skin irritation from copper).
- ● Mixing container: A clean, non-reactive bucket or large bowl (avoid aluminum).
- ● Stirring stick or spoon: Wooden or plastic to mix ingredients thoroughly.
- ○ Pruners (optional): Small, sharp pair to trim severely damaged leaves or stems before spraying.
- ○ Protective eyewear (optional): Safety goggles if spraying near eyes or in windy conditions.
- ● Weather check: Prerequisite! Apply only on a calm, dry day (avoid rain for 24 hours post-application).
- ● 🌡️ Temperature matters: Wait until temps are above 50°F (10°C)—copper can harm foliage in cold weather.
- ● ✨ Boost efficacy: Add 1 tsp of mild liquid soap (like Castile soap) to help the spray stick to leaves.
- ● 🔄 Reapply as needed: Repeat every 7–10 days or after rain until crispy edges improve.
Step-by-Step guide to reviving bay leaf foliage
Here's how to nurse back those crispy-edged bay leaves with a simple, effective copper treatment.
💧 Step 1: Assess and Trim Damaged Growth
Examine your bay leaf plant closely. Use clean, sharp scissors to snip away any leaves with crispy or brown edges—these won’t recover. Focus on the outer leaves first, as they’re most exposed to dry air and direct sun. You’ll notice the healthier inner leaves have smooth, vibrant green edges.
Don’t cut too aggressively—bay leaves respond better when you leave some structure intact. Remove only what’s clearly damaged, and avoid pruning more than one-third of the plant at once. This prevents stress and allows the plant to redirect energy to new growth.
☀️ Step 2: Adjust Light and Humidity Conditions
Bay leaves thrive in bright, indirect light—too much direct sun causes crispy edges by drying them out. Move your plant to a spot with filtered sunlight, like near an east-facing window or a few feet back from a south-facing one. You’ll see the leaves soften and regain pliability within 3-5 days.
Increase humidity around the plant by placing the pot on a tray filled with pebbles and water, or mist the leaves lightly twice daily. Avoid letting water pool on the leaves, as this can cause spotting. A small humidifier nearby also works well, especially in dry indoor climates.
🪴 Step 3: Apply Copper Spray for Fungal Prevention
Mix a 1 teaspoon of copper sulfate per quart of water in a spray bottle. Shake well before use, then lightly mist the undersides of the leaves—this is where fungal spores often hide. Copper acts as a preventative, stopping crispy edges from worsening due to fungal or bacterial issues.
Apply the spray in the early morning so the leaves have time to dry completely. Repeat every 7-10 days until new growth appears. Avoid spraying when the plant is stressed or in direct sunlight, as copper can burn tender foliage. You’ll notice healthier, glossier leaves within 2-3 weeks.
🌿 Step 4: Water and Feed for Recovery
Check the soil before watering—stick your finger 1 inch deep. If it feels dry, water thoroughly until water runs out the drainage holes. Bay leaves hate soggy roots but also need consistent moisture. Let the top inch dry between waterings to prevent root rot or crispy edges from overwatering.
Fertilize lightly with a balanced, water-soluble fertilizer (like 10-10-10) diluted to half strength. Feed every 4-6 weeks during the growing season (spring and summer). Over-fertilizing stresses the plant, so less is more. You’ll see new, vibrant growth emerging from the center of the plant within 3-4 weeks.
⏰ Step 5: Monitor and Maintain Progress
Keep an eye on the new growth—healthy bay leaves should be deep green with smooth edges. If crispy edges reappear, revisit your light and humidity setup. A simple adjustment, like moving the plant closer to a humidifier or rotating it for even light exposure, often fixes the issue.
Prune lightly again in 6-8 weeks to encourage bushier growth. Remove any leggy stems to promote a fuller, more compact plant. With consistent care, your bay leaves will bounce back with lush, crisp-free foliage ready for culinary use or decorative purposes.
Tips & tricks for perfect bay leaf foliage revival
Real talk: I’ve nursed back more than a few bay leaf plants from crispy-edge despair, and these tricks make all the difference.
Pruning Precision: When you’re trimming in Step 1, look for leaves with edges that feel dry to the touch—not just brown spots. These are the ones that won’t recover. I always leave at least one-third of the plant untouched to avoid shocking the roots. Think of it like a haircut—you want to shape, not strip.
Light and Humidity Hack: The 3-5 days to see softening in Step 2 can feel like forever, but trust me—it’s worth it. If your home has super-dry air (like many do in winter), group your bay leaf plant with other houseplants. They’ll all benefit from the shared humidity, and you’ll notice the crispy edges improving faster. A quick fix: Place a tray of water with pebbles under the pot, but make sure the pot isn’t sitting in water—bay leaves hate soggy roots.
Copper Spray Safety: In Step 3, when mixing your copper sulfate spray, always wear gloves. The copper isn’t just a fungal preventative—it’s also a skin irritant. Shake the bottle well before each use, because the copper tends to settle. I’ve seen people skip this, and their spray ends up uneven, leaving some leaves untreated. Pro tip: Test a small area first to ensure your plant isn’t sensitive to copper.
Pro Tips for Bay Leaf Foliage
- Real talk: I’ve nursed back more than a few bay leaf plants from crispy-edge despair, and these tricks make all the d...
- Pruning Precision: When you’re trimming in Step 1, look for leaves with edges that feel dry to the touch—not just bro...
- Light and Humidity Hack: The 3-5 days to see softening in Step 2 can feel like forever, but trust me—it’s worth it. I...
Frequently asked questions
How do I prevent crispy edges on my bay leaf foliage?
Crispy edges usually mean underwatering or low humidity. Water deeply when the top inch of soil feels dry, and mist the leaves occasionally. If the damage is severe, try a copper spray solution to protect against fungal stress.
When is the best time to prune bay leaf foliage?
Prune in early spring (before new growth starts) or late summer to encourage bushier foliage. Avoid heavy pruning in fall—it can stress the plant before winter. Always use sterilized shears to prevent disease.
Can I grow bay leaf foliage indoors? If so, what’s the ideal setup?
Place your bay leaf plant near a sunny window (south-facing is best) or under grow lights for 6–8 hours daily. Use well-draining soil and a pot with drainage holes. Humidity trays or a pebble tray can help mimic outdoor conditions.
What are some alternatives to bay leaf foliage if I can’t grow my own?
If you’re missing fresh bay leaves, try:
- Dried bay leaves (store-bought, but less potent)
- Oregano or thyme (similar earthy flavor in cooking)
- Laurel leaves (a close relative, often used in Mediterranean dishes)
- Bay leaf tea (steep 1–2 leaves in hot water for a calming herbal remedy)
Why are my bay leaf plants’ edges turning yellow or brown?
Yellowing edges often signal overwatering or nutrient deficiency, while brown spots could mean fungal issues (like powdery mildew) or pest damage. Check the soil moisture, improve airflow, and treat with copper spray if needed. Inspect leaves for pests like spider mites!
Pro Tip: Revive wilted bay leaf foliage fast!
If your plant looks sad but the roots are healthy, trim damaged leaves, repot in fresh soil, and give it a room-temperature shower to remove dust and stress. Place it in bright, indirect light and avoid overwatering for a week.
Wrapping up and next steps
Reviving your bay leaf foliage with copper spray is a game-changer—whether you're battling crispy edges or preventing future pests! 🌿 With the right tools and a little care, your plants can thrive for years.
Now that you’re armed with knowledge, why not take action today? Head to your garden, grab that copper spray, and give your bay leaves the fresh start they deserve. Happy growing! 🌱
- Next step: Check your bay leaves and apply the spray before symptoms worsen.
- Pro tip: Monitor your plants weekly for early signs of stress or pests!