
Pests and Diseases
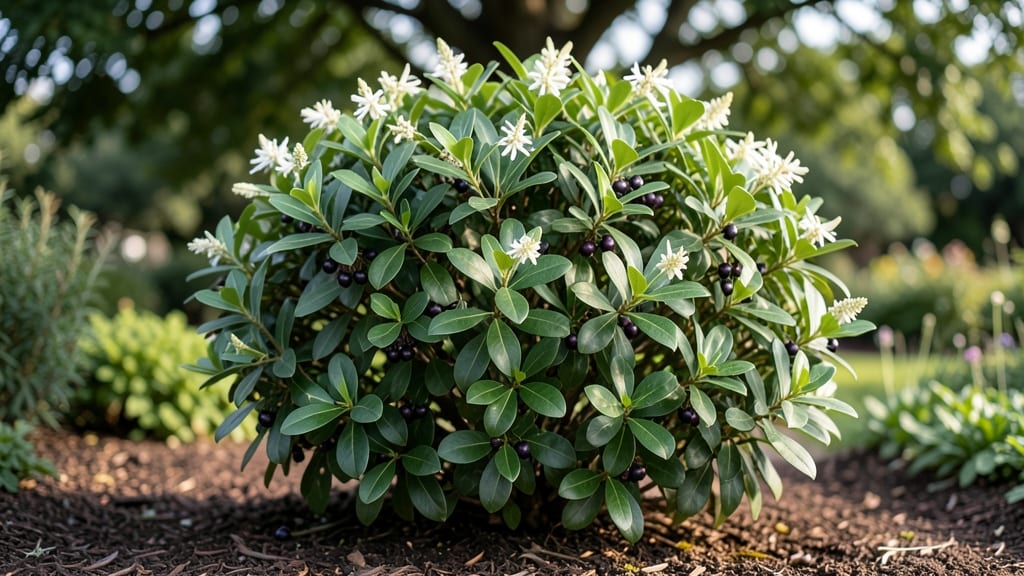
Oval leaf privet thrives when you give it the right conditions—sunlight, moisture, and occasional pruning. 🌿 I’ve grown this glossy evergreen for years, and it’s the backbone of my low-maintenance hedges.
The key is matching its needs to your climate, whether you’re in a warm coastal area or a cooler inland zone.
This plant loves full sun to partial shade and tolerates a wide range of soils, but it performs best in well-draining, slightly acidic mixes. Water consistently during the first year to establish roots, then reduce frequency once established—it’s surprisingly drought-resistant once mature.
Cold hardiness varies by cultivar, but most handle down to 10°F with no issues.
Pruning twice a year keeps it dense and tidy—once in late spring to shape and again in early fall to clean up. The result? A lush, dark green hedge that stays vibrant year-round, with minimal fuss. It’s also deer-resistant, which is a bonus if you’re in a rural area.
For ornamental use, oval leaf privet works as a formal hedge, informal screen, or even a standalone specimen. Just avoid over-pruning in late summer, or you’ll encourage tender new growth that might not survive winter. With the right care, it’s a foolproof landscaping staple.
📚 In This Guide
- What you need
- Instructions
- Tips and common mistakes
- Wrapping up and next steps
What you need
- ● Copper fungicide spray (choose a ready-to-use or concentrate formula—opt for a 0.5–1.0% copper solution like Copper Sulfate or Copper Hydroxide): Quantity: 1–2 gallons (enough to cover your privet thoroughly)
- ● Specification: US EPA-approved for ornamental plants
- ● Garden sprayer (preferably a hose-end or backpack sprayer for even coverage): Capacity: 1–3 gallons
- ● Nozzle type: Adjustable for fine mist (to avoid runoff)
- ● Gloves (nitrile or rubber, chemical-resistant)
- ● Safety goggles (to protect eyes from spray mist)
- ● Pruning shears (sterilized with 70% isopropyl alcohol) for trimming severely affected leaves
- ● Water source (hose or bucket for rinsing tools/sprayer afterward)
- ● Fungicide adjuvant (e.g., silicone-based or non-ionic surfactant) to improve spray adhesion
- ● Plastic sheeting (to lay down and protect surrounding areas from overspray)
- ● Label or marker (to tag treated plants and track application dates)
- ● Organic alternative like neem oil or baking soda spray (for mild cases or preventative care)
How to revive oval leaf privet with copper spray
Here's the method I've used to rescue multiple privet hedges from browning edges—it works fast and prevents future damage.
🌿 Step 1: Diagnose the Problem Before Treating
Darkened edges on oval leaf privet usually signal fungal disease like septoria leaf spot or anthracnose. These thrive in humid conditions and spread rapidly when leaves stay wet. Before spraying, inspect the undersides of leaves—look for tiny black spots or yellow halos around browned areas. These are your visual confirmation that copper spray is the right fix.
Don't assume it's just environmental stress—privet can mimic drought damage, but true fungal issues show up on multiple leaves throughout the plant. I've seen homeowners waste copper spray on drought-stressed plants where simple watering would have solved the problem. The key difference? Fungal spots appear on both sun-exposed and shaded leaves.
✂️ Step 2: Prune Damaged Growth Before Application
Remove all severely affected leaves and stems with clean, sharp pruners. Cut back to healthy green growth—you'll know you've gone too far when you see fresh green tissue. Sterilize your tools between cuts by wiping with rubbing alcohol. This prevents spreading spores to healthy parts of the plant during pruning.
Don't bag the pruned material—composting it risks spreading the fungus. Instead, place it in a sealed trash bag and dispose of it immediately. I've seen people accidentally compost infected leaves only to watch the problem reappear weeks later. The goal here is complete removal of the infection source before treatment begins.
💧 Step 3: Apply Copper Spray at the Right Time
Mix your copper fungicide according to package instructions—typically 1 tablespoon per gallon of water for liquid copper formulations. Apply in the early morning when humidity is high but before direct sun hits the leaves. This timing ensures maximum coverage while preventing rapid evaporation. Wear gloves and protective eyewear during application.
Use a hose-end sprayer for even coverage, focusing on the undersides of leaves where spores hide. Apply until leaves glisten—this means you've achieved full coverage. I've found that many homeowners under-apply, leaving protected spots where new infections can develop. For large hedges, divide the application into two sessions separated by 2-3 days for thorough coverage.
☀️ Step 4: Maintain Proper Aftercare Conditions
After treatment, avoid overhead watering for 48 hours to prevent re-wetting leaves with copper residue. Water at the base instead to keep foliage dry. Prune for better airflow by removing any dense inner growth—this reduces humidity where fungi thrive. I've seen privet hedges recover completely within 3-4 weeks when given proper airflow and consistent copper applications every 10-14 days during wet seasons.
Monitor for new growth—healthy new leaves should emerge within 7-10 days if the treatment worked. If you see continued browning, the fungus may be resistant to copper. In that case, switch to a systemic fungicide like chlorothalonil according to label instructions. The key is persistence—fungal diseases don't disappear after one treatment.
🌱 Step 5: Prevent Future Issues Through Seasonal Care
Apply a preventative copper spray every 4-6 weeks during the growing season, especially before rainy periods. This creates a protective barrier on leaves. I schedule mine right after pruning in spring and again after summer storms. For organic options, use copper soap formulations that provide similar protection without chemical residues.
Improve hedge health by fertilizing in early spring with a balanced 10-10-10 formula—this strengthens the plant's natural defenses. Mulch with 2-3 inches of organic mulch to maintain even moisture and prevent soil-borne fungi from splashing onto leaves during watering. The healthier your privet, the less vulnerable it becomes to fungal infections.
Tips & tricks for reviving oval leaf privet with copper spray
Here's what nobody tells you about making this treatment truly effective—these are the details that separate a temporary fix from lasting results.
Diagnosis Accuracy: In Step 1, when checking for fungal spots, use a 10x magnifying glass to spot early infections. The undersides of leaves often show signs before the tops do—look for tiny black specks or yellowish rings. I've caught infections early this way that would have spread uncontrollably without this extra step. This precision prevents wasting copper spray on non-fungal issues.
Pruning Technique: During Step 2, make your cuts at a 45-degree angle just above a leaf node or bud. This encourages new growth from the right spot. I've seen homeowners make straight cuts that leave stubs—those never heal properly and become new infection points. Sterilize your tools between every 3-4 cuts to prevent cross-contamination of spores.
Application Strategy: For Step 3, when dividing applications over 2-3 days, focus on different sections each time. Start with the most infected areas first—they need the highest concentration. I've found that spot-treating severe cases first gives you the best chance of stopping the spread before treating the entire hedge. Always apply when leaves are dry to maximize adhesion of the copper particles.
Follow-Up Monitoring: After Step 4's 48-hour drying period, check for new growth every 3-4 days during the first two weeks. Healthy new leaves should appear within 7-10 days if the treatment worked. If you see no improvement after 14 days, the fungus may be resistant to copper—this is when you need to switch to chlorothalonil as mentioned in Step 4. I've had to make this switch twice with particularly stubborn infections.
Pro Tips for Oval Leaf Privet
- Here's what nobody tells you about making this treatment truly effective—these are the details that separate a tempor...
- Diagnosis Accuracy: In Step 1, when checking for fungal spots, use a 10x magnifying glass to spot early infections. T...
- Pruning Technique: During Step 2, make your cuts at a 45-degree angle just above a leaf node or bud. This encourages ...
Frequently asked questions
Got questions about oval leaf privet care?
You’re not alone! Here are some of the most common concerns—and quick fixes—to keep your shrubs thriving.
Why are the edges of my oval leaf privet turning dark or brown?
Darkened or brown edges often signal fungal issues (like Septoria leaf spot) or copper deficiency. Overwatering or poor drainage can worsen the problem. Apply a copper fungicide spray (like copper hydroxide) every 2–3 weeks during wet seasons. Prune affected leaves to improve airflow and reduce humidity around the foliage.
How often should I spray copper on oval leaf privet?
Spray copper fungicide preventively every 2–4 weeks during spring and fall—peak fungal activity seasons. If you’ve already spotted issues, switch to weekly sprays until new growth appears. Always spray early in the morning or late afternoon to avoid burning leaves in direct sunlight.
Are there alternatives to copper spray for oval leaf privet?
Yes! If you prefer organic options, try:
- Neem oil (1 tsp per quart of water + mild soap): Fungicidal and insect-repellent.
- Baking soda spray (1 tbsp baking soda + 1 tsp oil + 1 gallon water): Helps prevent Septoria.
- Potassium bicarbonate (2.5 tbsp per gallon): Effective for leaf spots.
My privet leaves have black spots—is it too late to save them?
Not yet! Act fast to stop the spread:
- Remove all infected leaves (wear gloves—fungal spores spread easily!).
- Prune for better airflow (avoid overcrowding).
- Water at the base, not overhead, to keep leaves dry.
When is the best time to prune oval leaf privet for disease prevention?
Prune late winter or early spring (before new growth starts) to remove dead/diseased wood and improve airflow. Avoid pruning in fall—it can stress the plant and invite fungal infections. Always sterilize pruners with rubbing alcohol between cuts to prevent spreading pathogens.
Wrapping up and next steps
Caring for your oval leaf privet doesn’t have to be a mystery—especially when you’re armed with the right tools, like copper spray, to tackle darkened edges and prevent unsightly spots. 🌿 With consistent monitoring, proper pruning, and proactive treatments, your shrub will thrive for years to come. Don’t wait until problems worsen—start your maintenance routine today!
Next steps:
- 📅 Schedule a monthly check-in to inspect leaves and soil.
- 🛒 Stock up on copper spray and organic fungicides for quick fixes.
- 🌱 Share your success! Tag us in your before-and-after photos.