
Pests and Diseases
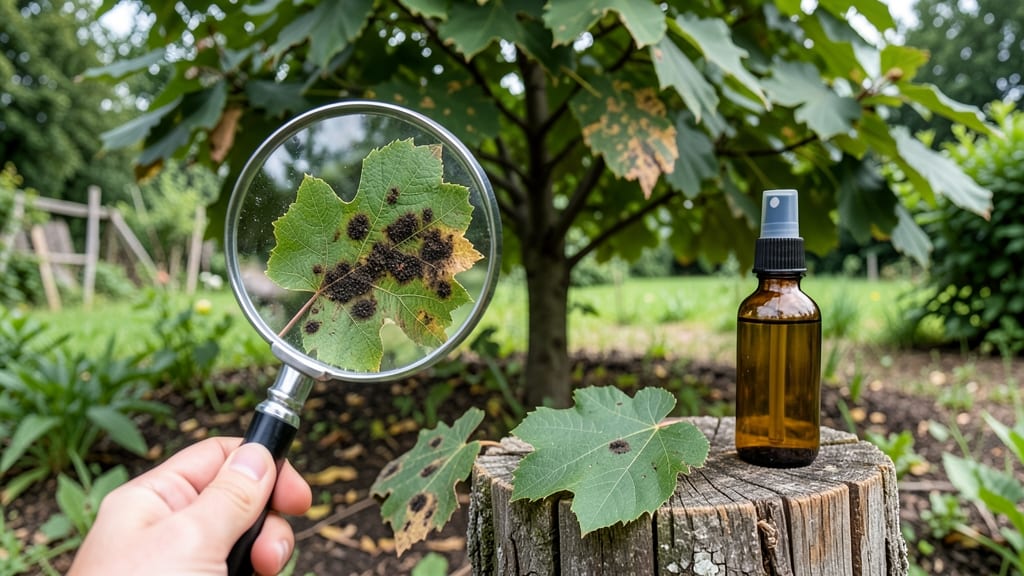
When mulberry leaves start turning yellow with black spots or white powder, you're dealing with leaf disease—and copper spray is your best organic cure. 🌿 I've battled anthracnose and powdery mildew on my mulberry trees, and this method saved them every time.
The key is acting fast before the fungus spreads to the entire canopy. Diseases like anthracnose and powdery mildew thrive in damp, shady conditions, but copper spray disrupts their life cycle.
You'll need a copper fungicide (like copper sulfate or copper hydroxide), a sprayer, and a clear day for application. The spray works by creating a protective barrier on leaves while also killing existing spores.
After just one application, you'll see new growth emerge free of spots within 7-10 days. For severe cases, repeat every 10-14 days until the leaves fully recover. The copper leaves a faint blue tint that washes away with rain, and it's safe for bees once dry.
This method works for mulberries, grapes, and other susceptible plants. The secret is consistency—don't skip treatments once you start, and always spray undersides where spores hide. Your trees will bounce back stronger than ever.
Root Causes of Mulberry Leaf Decline
Understanding why mulberry leaf disease strikes is the first step toward prevention and treatment. These issues often arise from a mix of environmental stress, microbial attacks, and poor plant health. Below, we break down the key culprits behind leaf discoloration, spots, and overall decline in mulberry trees.
---
Fungal pathogens are the most common cause of mulberry leaf disease, thriving in warm, humid conditions. Here’s how they take hold:
- Botryosphaeria Fungus – This fungus causes dieback disease, leading to dark, sunken spots on leaves and branches.
It spreads through wounds (like pruning cuts) and weakens the tree’s vascular system, blocking water flow. - Anthracnose (Colletotrichum spp.) – Favors wet foliage and high humidity, creating circular brown or black spots with yellow halos.
It often starts on older leaves and spreads rapidly in rainy seasons. - Powdery Mildew (Erysiphe spp.) – Appears as white, powdery patches on leaf surfaces, reducing photosynthesis. It flourishes in shaded, poorly ventilated areas where leaves stay damp.
💡 Pro Tip: Fungal spores spread via wind, water splashes, and contaminated tools. Prune infected branches early in the day when humidity is lower to minimize spore dispersal.
---
Insects don’t just feed on mulberry leaves—they create entry points for diseases. Here’s how they contribute:
- Scale Insects & Aphids – These sap-suckers excrete honeydew, a sticky residue that fosters sooty mold (a secondary fungal growth). Sooty mold blocks sunlight, further stressing the tree. - Japanese Beetles & Spider Mites – Their feeding damages leaf tissue, making it vulnerable to fungal infections.
Heavy infestations lead to premature leaf drop and stunted growth. - Borers (e.g., Mulberry Shoot Borer) – Larvae tunnel into branches, disrupting nutrient transport. Infested branches often wilt, dieback, or ooze sap, inviting fungal colonization.
✨ Actionable Fix: Apply neem oil or insecticidal soap to control pests before they cause irreversible damage. For severe infestations, consider systemic insecticides like imidacloprid (follow label instructions).
---
Mulberry trees are hardy, but extreme or inconsistent conditions can trigger disease symptoms:
- Poor Air Circulation – Dense foliage or overcrowded trees trap moisture, creating ideal fungal breeding grounds. Prune to improve airflow, especially in humid climates. - Nutrient Deficiencies – Lack of magnesium (Mg) or iron (Fe) causes yellowing between leaf veins (interveinal chlorosis), mimicking disease.
Test soil and amend with Epsom salt (MgSO₄) or chelated iron. - Temperature Fluctuations – Sudden heatwaves or frost weaken the tree’s defenses.
Mulberries prefer moderate climates (USDA Zones 5–9); avoid planting in areas with extreme swings. - Overwatering or Waterlogging – Soggy roots suffocate roots and promote fungal growth like Phytophthora. Ensure well-draining soil and water deeply but infrequently.
🔥 Quick Check: If leaves yellow only on new growth, it’s likely a nutrient issue. If older leaves yellow first, fungal disease is the probable cause.
--- Human mistakes often accelerate mulberry leaf problems:
- Improper Pruning – Cutting at the wrong time (late fall/winter) or using unsterilized tools introduces bacterial/fungal infections. Always prune in early spring and sanitize tools with 70% isopropyl alcohol. - Over-Fertilization with Nitrogen – Excess N promotes soft, succulent growth that fungi love.
Use a balanced fertilizer (10-10-10) and avoid heavy nitrogen in wet seasons. - Planting in Shade – Mulberries need 6+ hours of sunlight. Shaded trees develop weak, disease-prone foliage and fail to photosynthesize efficiently.
🎯 Prevention Tip: Space mulberry trees 15–20 feet apart to reduce humidity buildup and improve sunlight penetration.
Fixing Mulberry Leaf Damage Fast
Mulberry leaf disease—whether caused by fungal infections, pests, or nutrient deficiencies—can weaken your trees if left unchecked. The good news? Most issues have practical, actionable fixes that don’t require a degree in horticulture.
Below, we’ve mapped common causes to their solutions, along with prevention tips to keep your mulberry trees thriving.
---
Fungal diseases like anthracnose, powdery mildew, or leaf spot thrive in damp conditions and can turn vibrant leaves into a sad, spotted mess. Here’s how to stop the spread and revive your tree:
#### 🔥 Step 1: Remove Infected Leaves Immediately - Why? Fungi spread like wildfire—literally.
Infected leaves harbor spores that reinfect healthy foliage. - How? Snip off yellowing, brown, or spotted leaves with sterilized pruners (wipe with rubbing alcohol between cuts). - Pro Tip: 💡 Don’t compost these leaves—toss them in the trash to prevent reinfection.
#### 🍳 Step 2: Apply a Copper-Based Fungicide Copper is nature’s fungicide and works against most leaf diseases.
Here’s how to use it right: - Best Products: - Bordeaux mixture (copper sulfate + lime) - Copper fungicide sprays (like Bonide Copper Fungicide) - How to Spray: - Mix according to label instructions (usually 1 tbsp per gallon of water). - Spray early morning or late evening (avoid direct sunlight—it can burn leaves). - Cover both sides of leaves and the tree trunk. - Reapply every 7–14 days until new growth appears.
#### 👨🍳 Step 3: Improve Airflow & Reduce Moisture Fungi love humidity and stagnant air.
Break their party with: - Prune overcrowded branches to allow sunlight and air to circulate. - Space mulberry trees 10–15 feet apart if planting new ones. - Water at the base (not overhead) to keep leaves dry. - Avoid overhead irrigation—use drip systems instead.
#### ✨ Prevention for Next Season - Sanitize tools before and after pruning. - Apply copper spray preventatively in early spring (before fungal spores wake up). - Mulch properly—keep mulch 2–3 inches away from the trunk to prevent rot.
---
If aphids, spider mites, or scale insects are sucking the life out of your mulberry leaves, neem oil and natural predators are your best weapons.
#### 🔪 Step 1: Blast Off Pests with Neem Oil Neem oil smothers pests on contact and disrupts their life cycle. - Recipe: - Mix 1 tbsp neem oil + 1 tsp mild soap + 1 quart water. - Spray directly on pests (focus on undersides of leaves). - Reapply every 5–7 days until pests disappear. - Pro Tip: 🌡️ Apply when temps are above 50°F—cold weather reduces effectiveness.
#### 🐞 Step 2: Introduce Beneficial Insects Ladybugs, lacewings, and parasitic wasps eat pests for breakfast. - Where to Buy: Local garden centers or online (e.g., Arborjet or Garden Safe). - How to Release: - Follow package instructions (usually release at dusk). - Keep them hydrated with a shallow water dish.
#### 🎯 Step 3: Disrupt Their Life Cycle Pests love soft, new growth.
Keep them off-balance with: - Prune heavily infested branches and destroy them. - Use reflective mulch (like aluminum foil) to confuse whiteflies. - Spray water on leaves to knock off aphids (do this early morning so leaves dry fast).
#### 💡 Prevention Tips - Inspect leaves weekly—catch infestations early. - Avoid broad-spectrum pesticides (they kill beneficial bugs too). - Plant companion plants like marigolds or basil to repel pests naturally.
---
Yellowing leaves, stunted growth, or purple stems? Your mulberry might be starving for nutrients. Here’s how to diagnose and feed it right:
#### 📊 Step 1: Test Your Soil (Cheap & Easy) - DIY Test Kit: Pick up a $20 home soil test kit (like Luster Leaf). - Send to a Lab: For precise results, mail a sample to a local extension office (~$15–$20). - What to Look For: - Low nitrogen? → Leaves turn yellow (chlorosis). - Low iron? → Yellow leaves with green veins. - Low potassium? → Brown leaf edges.
#### 🍎 Step 2: Fertilize Based on Deficiencies | Problem | Solution | How to Apply | |---------------------------|------------------------------------------------------------------------------|-------------------------------------------| | Nitrogen Deficiency | Balanced fertilizer (10-10-10) or compost | Sprinkle around roots, water deeply. | | Iron Deficiency | Iron chelate or Epsom salt (magnesium sulfate) | Mix 1 tbsp Epsom salt per gallon water, spray on leaves. | | Potassium Deficiency | Wood ash or potassium sulfate | Sprinkle 1 cup wood ash per tree, water in. | | Zinc/Manganese Defic. | Seaweed extract or foliar spray with micronutrients | Spray directly on leaves (diluted). |
#### 🌿 Step 3: Improve Soil Long-Term - Add compost (2–3 inches around the base, not touching the trunk). - Mulch with organic matter (straw, wood chips) to retain moisture and nutrients. - Avoid over-fertilizing—mulberries prefer moderate fertility, not a chemical cocktail.
#### ✨ Prevention for Healthy Growth - Test soil every 2–3 years (even if trees look fine). - Avoid heavy clay soils—amend with sand or peat moss if drainage is poor. - Water deeply but infrequently (mulberries hate soggy roots).
---
If your mulberry tree is already heavily damaged, act fast with these last-resort fixes:
1. 🌪️ Severe Fungal Outbreak? - Prune back 20–30% of the tree to remove infected wood. - Apply a stronger fungicide (like copper hydroxide) and repeat weekly.
2. 🐛 Pest Invasion Taking Over? - Horticultural oil spray (like JMS Stylet Oil) for scale and mites. - Systemic insecticide (like imidacloprid) for aphids and whiteflies (follow label carefully).
3. 🍂 Tree Looks Dying? - Check for root rot—if soil smells foul, reduce watering and improve drainage. - Transplant if necessary (young trees can recover if roots are healthy).
--- Final Thought: Most mulberry leaf issues are preventable with regular inspections, proper care, and quick action. Start with copper sprays for fungi, neem oil for pests, and soil tests for nutrients—your trees will thank you with lush, disease-free foliage in no time! 🌿💪
Frequently asked questions about mulberry leaf diseases
What are the most common signs of mulberry leaf disease?
Look for dark brown/black spots (anthracnose), white powdery patches (powdery mildew), or yellowing between veins (nutrient deficiency). Early symptoms often appear on older leaves first, but severe cases can affect new growth too.
Can mulberry trees recover from leaf disease?
Yes! With prompt treatment, mulberries often bounce back. Start by removing infected leaves, applying copper fungicide every 7-14 days, and improving airflow. Severe cases may require pruning back 20-30% of affected branches to stimulate new growth.
Is copper spray safe for mulberry trees?
When used correctly, copper fungicides are safe and effective for mulberries. Apply in early morning or evening to avoid leaf burn, and always follow label instructions. The faint blue tint washes away with rain, and it's safe for bees once dry.
How do I prevent mulberry leaf disease next season?
Focus on proper spacing (15-20 feet apart), pruning for airflow, and preventative copper sprays in early spring. Avoid overhead watering, and always sanitize pruning tools with 70% isopropyl alcohol between cuts.
What's the difference between fungal spots and pest damage?
Fungal spots appear as raised, irregular patches with possible yellow halos, while pest damage often shows as small holes, webbing, or sticky honeydew. Check leaf undersides for tiny insects—if you see them, neem oil is your best first defense.