
Pruning
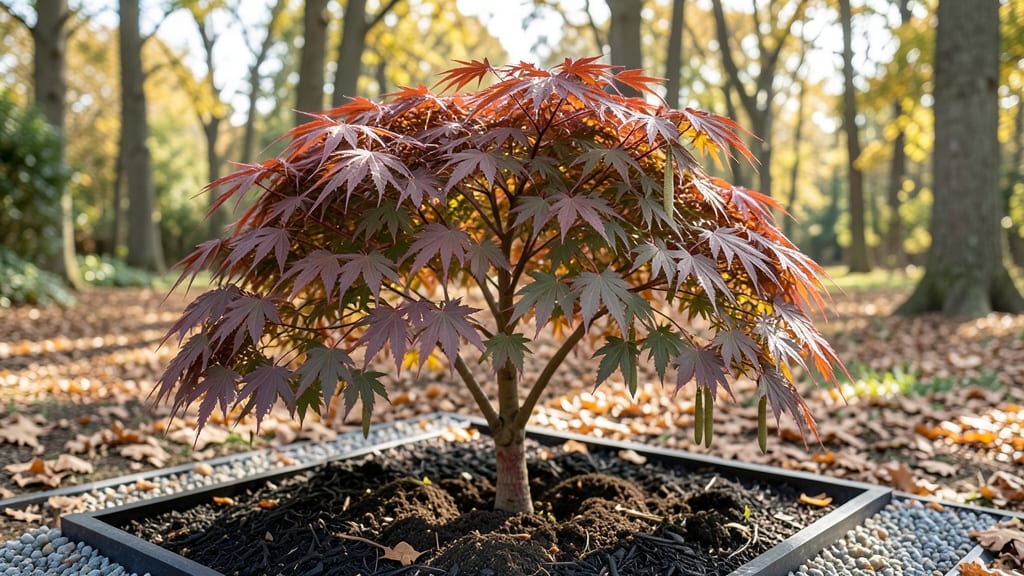
That first delicate Japanese maple leaf you spot in spring is just the beginning—year-round drama unfolds in its branches with the right pruning touch. ✨ I’ve watched my own trees transform from scraggly to showstopping by learning when to trim, where to cut, and how to encourage that vibrant foliage we all crave.
The secret isn’t aggressive pruning—it’s knowing the subtle cues your tree gives you.
Most people overlook the spring flush of new growth as their pruning window, but that’s exactly when your tree signals it’s ready for shaping. You’ll need sharp bypass pruners, a ladder (for taller varieties), and a clear morning to assess the canopy.
The goal? Open the center for airflow while preserving the graceful silhouette that makes Japanese maples so special. Even a single misplaced cut can set back that lush, jewel-toned foliage for months.
By summer’s end, you’ll notice the difference: leaves stay richer in color, branches fill in more evenly, and the tree resists pests better. The key is working with the natural growth pattern—never removing more than 25% of the canopy in one season.
That delicate balance keeps your tree thriving while letting you sculpt it into the focal point of your garden.
This method works for both dwarf varieties in containers and mature specimens in the ground, though larger trees may need a two-year pruning plan to avoid stress. The payoff? A tree that puts on a foliage show from spring’s first blush through autumn’s fiery finale—with minimal effort from you.
📚 In This Guide
- What you need
- Instructions
- Tips and common mistakes
- Wrapping up and next steps
What you need
- ● Pruning shears: Bypass pruners (sharp, clean, and sterilized with rubbing alcohol or a 10% bleach solution). Choose a pair with ergonomic handles for comfort.
- ● Loppers: For thicker branches (¼" to ¾" diameter). Opt for bypass-style loppers with a ratchet mechanism for ease.
- ● Hand pruners (felco or similar): For precision cuts on smaller branches (replaceable blades for longevity.
- ● Gloves: Heavy-duty, cut-resistant gloves (e.g., Mechanix or garden-specific) to protect hands from thorns and sharp tools.
- ● Disinfectant: 70% isopropyl alcohol or a 10% bleach solution (1 part bleach to 9 parts water) to sterilize tools between cuts.
- ● Sealing wax or pruning paint: (e.g., Tanglefoot Tree Wound Pruning Sealer) to coat cuts larger than ½" in diameter.
- ● Ladder or step stool: Sturdy and non-slip, tall enough to reach the highest branches safely.
- ● Bucket or trash bag: For collecting pruned leaves and small branches.
- ● Notebook & pencil: To jot down notes on cuts, branch locations, or seasonal pruning plans.
- ● Extension pole saw: For high branches without a ladder (e.g., Fiskars X27).
- ● Safety glasses: To shield eyes from debris.
- ● Knee pads: For comfort during ground-level pruning.
- ● String or flagging tape: To mark branches for future reference.
- ● Spray bottle with water: To dampen dusty leaves before cutting.
Step-by-step instructions for Japanese maple leaf pruning
Transform your tree's shape and health with just a few strategic cuts—no green thumb required.
✂️ Step 1: Assess the Tree and Plan Your Cuts
Start by examining your Japanese maple from all sides. Look for branches that cross or rub against each other—they’ll eventually damage each other’s bark. Also spot any dead, diseased, or weak branches (they’ll be brittle, discolored, or without leaves). I like to sketch a rough map of the tree’s shape on paper, marking branches I want to reduce or remove. This helps visualize the final look before making any cuts.
Focus on maintaining an open center—Japanese maples thrive when air circulates freely. You’ll see healthy trees have a natural vase shape with branches spreading evenly. Avoid cutting more than 25% of the tree’s foliage in one season, or you risk stressing it. The goal is subtle refinement, not drastic transformation.
✂️ Step 2: Prune for Structure and Health
Use sharp, clean pruning shears to make cuts just outside the branch collar—the swollen area where the branch meets the trunk. This ensures the wound heals properly. For small branches under ¼ inch thick, I use hand pruners; for thicker branches, grab your loppers. Always cut at a 45-degree angle to shed water away from the wound. Start with dead or diseased branches first—they’re the easiest to spot and remove.
Next, thin out crowded branches to improve airflow. Remove branches that grow inward or downward, as they’ll compete with others for sunlight and nutrients. You’ll know you’re doing it right when you can see light filtering through the canopy more easily. Never remove more than one-third of a branch’s length in one cut—this prevents shock. If a branch is too thick to cut cleanly, make a second cut further back to avoid tearing.
☀️ Step 3: Shape for Seasonal Drama
For year-round interest, focus on preserving the tree’s natural form while enhancing its seasonal highlights. In late winter or early spring, before new growth begins, prune to open up the center and encourage air circulation. This is also the best time to correct any awkward growth from the previous year. I like to step back every few cuts to check the balance—your tree should look harmonious from all angles.
If your Japanese maple has variegated or colorful leaves, avoid heavy pruning in summer. The stress of cutting can reduce foliage production, dulling the vibrant hues you’re trying to showcase. Instead, do light maintenance pruning in early fall to remove any dead or damaged leaves and tidy up the shape. This keeps the tree looking polished without sacrificing its seasonal beauty.
🌿 Step 4: Clean Up and Monitor Recovery
After pruning, remove all debris from the ground and sterilize your tools with rubbing alcohol to prevent disease spread. I also like to apply a thin layer of pruning sealant to cuts larger than ½ inch to reduce the risk of infection. While sealant isn’t always necessary for Japanese maples, it’s a good precaution if you’re working in a humid climate or during rainy seasons.
Watch your tree closely for the next 2-3 weeks. Healthy new growth should appear within a few weeks, and the tree should look fuller and more balanced. If you notice any wilting, yellowing, or unusual spots, it could signal stress or disease. In that case, reduce watering slightly and avoid any further pruning until the tree recovers. A well-pruned Japanese maple will reward you with lush, vibrant foliage and a stunning silhouette for years to come.
Tips & tricks for perfect Japanese maple leaf pruning
Here's what nobody tells you about keeping your Japanese maple thriving after pruning—these tricks make all the difference.
The Right Tool for the Job: Invest in a good pair of bypass pruners for clean cuts on branches under ¼ inch thick—they create smoother wounds that heal faster. For thicker branches, loppers with a 6-inch cutting head give you the leverage you need without damaging the branch collar. I've ruined several cuts trying to force small pruners on thicker branches, so don't make that mistake!
Seasonal Timing is Everything: Late winter or early spring is ideal for major pruning because the tree is still dormant but about to burst with new growth. This timing lets you shape the tree without interfering with its seasonal color display. If you must prune in summer, limit yourself to removing only dead or damaged branches—never more than 10% of the foliage—to preserve that vibrant color.
Visual Balance Check: After every few cuts, step back and look at your tree from all angles. The goal is to maintain that natural vase shape where branches spread evenly. I like to imagine the tree as a vase—if one side looks heavier, that's where you should make your next thinning cuts. This simple visual trick prevents that lopsided look that's so hard to fix later.
Healing Hacks: For cuts larger than ½ inch, apply pruning sealant immediately after cutting to reduce infection risk, especially in humid climates. I've seen some gardeners swear by organic alternatives like beeswax or tree wound dressing—just make sure whatever you use is approved for ornamental trees. The key is to apply it thinly so it doesn't suffocate the wound completely.
Pro Tips for Japanese Maple Leaf
- Here's what nobody tells you about keeping your Japanese maple thriving after pruning—these tricks make all the diffe...
- The Right Tool for the Job: Invest in a good pair of bypass pruners for clean cuts on branches under ¼ inch thick—the...
- Seasonal Timing is Everything: Late winter or early spring is ideal for major pruning because the tree is still dorma...
Frequently asked questions
Got questions about keeping your Japanese maple’s leaves looking their best with minimal pruning? Here are some common concerns—and their answers—to help you navigate the year-round foliage drama with confidence!
When is the best time to prune Japanese maple leaves for vibrant foliage?
The ideal time is late winter or early spring (just before buds swell), but light shaping can happen year-round. Avoid heavy pruning in summer or fall—this stresses the tree and risks disease. For colorful varieties, prune after leaves drop (fall/winter) to preserve next season’s hues.
Can I prune Japanese maple leaves in summer without damaging the tree?
Yes, but keep it minimal! Summer pruning should focus on dead or diseased branches only—never more than 10-15% of the canopy. Heavy cuts now can trigger leaf scorch or attract pests. If shaping, do it early morning to reduce stress and water thoroughly afterward.
What’s the difference between pruning for shape vs. health in Japanese maples?
| Shape Pruning | Health Pruning |
|---|---|
| Trims selective branches to maintain form (e.g., removing upward-growing limbs). Best in dormant season. | Removes dead, crossing, or diseased wood year-round. Uses sterilized tools to prevent infection. |
Pro tip: Japanese maples bleed sap when pruned in spring—seal cuts with pruning sealant if needed!
Why are my Japanese maple leaves turning brown after pruning?
Brown leaves post-pruning usually mean over-pruning or stress. Check for:
If brown spots persist, test for fungal issues (like anthracnose) and treat with copper fungicide. If you want dramatic foliage with less pruning, try:
Note: These won’t need the same precision pruning but may lack the Japanese maple’s delicate structure.
Are there low-maintenance alternatives to Japanese maples with similar leaves?
Wrapping up and next steps
From seasonal secrets to strategic cuts, mastering Japanese maple leaf pruning transforms your tree into a year-round masterpiece—without the guesswork! 🌿 Whether you’re shaping for drama or simply maintaining health, the key is patience, precision, and timing.
Now that you’re armed with the right tools and techniques, why not take the next step?
- 📅 Schedule a pruning session—grab your tools and give your tree the care it deserves this weekend!
- 📸 Document the process—track your tree’s growth and share your progress with fellow gardening enthusiasts.
- 🌱 Expand your skills—explore other pruning styles or even propagate cuttings to grow your own Japanese maple collection!
Your tree’s foliage drama starts with you—happy pruning! ✂️💚