
Watering
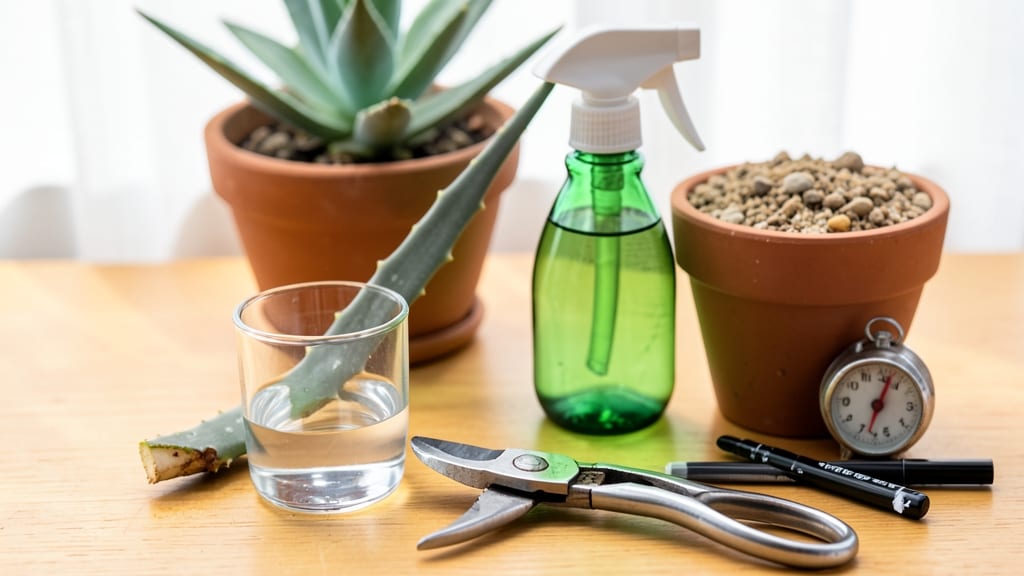
How to save an aloe leaf with brown edges doesn’t mean it’s time to say goodbye—just a quick fix. ✨ I’ve nursed back more aloe leaves than I can count, and the secret lies in understanding whether your plant is thirsty, sunburned, or just telling you it’s time for a trim. The good news? Most damaged leaves can bounce back in 24 hours with the right care.
First, check the damage: crispy brown edges usually mean underwatering or too much sun, while mushy spots signal overwatering. Snip off any dead tissue with clean scissors, leaving healthy green behind.
If the leaf is beyond saving, don’t toss it—propagate it! Aloe cuttings root easily in dry soil, giving you a free plant in just a few weeks.
Place your revived leaf in bright, indirect light and water only when the soil is bone-dry. Overwatering is the #1 killer of aloe, so resist the urge to hydrate unless the soil feels like a desert.
Within a day, you’ll see the edges perk up, and in a week, new growth will push out from the base.
This works for any aloe variety—whether it’s your first plant or a mature specimen. The key is patience and precision. Once you master this, your aloe will look so lush you’ll be the envy of every plant parent in your neighborhood.
📚 In This Guide
- What you need
- Instructions
- Tips and common mistakes
- Wrapping up and next steps
What you need
- ● 1 healthy aloe leaf (with brown edges—this is what we’re saving!)
- ● 1 small bowl or container (for water, ~4–6 oz capacity)
- ● Room-temperature water (filtered or distilled is best, ~1 cup)
- ● 1 clean paper towel or soft cloth (for gentle drying)
- ● 1 pair of scissors or pruning shears (sterilized, for trimming if needed)
- ○ 1 spray bottle (optional but helpful) (2–4 oz, for misting)
- ● Hydrogen peroxide (3%) (1 tsp in water for a sanitizing soak if the leaf looks dirty)
- ○ Rooting hormone (optional) (to boost regrowth if replanting)
- ● Small pebble tray or saucer (for drainage if repotting)
- ● Potting mix for succulents (if you plan to replant the leaf)
Step-by-Step instructions for reviving an aloe leaf
Here’s how to bring back that crispy-edged aloe leaf—no special supplies needed, just a little TLC.
💧 Step 1: Trim the Damaged Edges
Use clean, sharp scissors or pruning shears to snip off the brown, crispy edges of the leaf. I cut just past the healthy green tissue—this prevents the damage from spreading to the good parts. The goal is to remove only the dead sections while keeping as much of the leaf intact as possible.
If the leaf is severely browned, you might need to trim more than you think. Remember, aloe leaves can regenerate from the base, so don’t worry about losing a little length. Work gently but decisively—aloe leaves are tough, but they don’t like rough handling.
🪴 Step 2: Isolate the Leaf for Recovery
Place the trimmed leaf in a dry, shaded spot for 24 hours. This lets the cut ends callus over, which prevents rot when you replant it. I like to set it on a paper towel in a warm, indirect-light area—like a kitchen counter away from the window.
Don’t water it yet. The leaf needs time to heal, and moisture right now could encourage bacterial growth at the fresh cuts. If you’re impatient, you can speed up the callusing process by lightly dusting the trimmed ends with cinnamon powder (it’s antifungal and speeds up healing).
☀️ Step 3: Replant with Proper Care
After 24 hours, replant the leaf in well-draining soil—like a mix of cactus/succulent mix and perlite (if you have it). Push the base of the leaf about ½ inch deep into the soil, leaving the trimmed end exposed. This ensures the leaf stays upright and doesn’t rot at the base.
Water lightly only after replanting—just enough to moisten the soil around the base. Overwatering is the #1 killer of aloe leaves, so resist the urge to give it a big drink. Instead, wait until the top 1 inch of soil feels dry before watering again. You’ll know it’s happy when new growth appears at the base in 2-4 weeks.
⏰ Step 4: Monitor Light and Hydration
Move the replanted leaf to bright, indirect light for the first week. Direct sun can stress a recovering leaf, so if you’re outside, choose a spot with morning sun or dappled shade. After a week, you can gradually introduce it to morning sunlight to help it toughen up.
Check the soil every 3-4 days. Aloe leaves store water, so they’re drought-tolerant, but the soil should never stay soggy. If the leaf starts to wrinkle, it’s thirsty—water lightly. If it turns yellow or mushy, you’re overwatering. Adjust your schedule until you find the sweet spot.
🌱 Step 5: Encourage New Growth
Once the leaf has settled in and you see tiny new shoots at the base, it’s time to give it a little more attention. This is your sign that the leaf is healing. I like to fertilize lightly with a diluted succulent fertilizer (half-strength) every 2 months in spring and summer to support new growth.
If the leaf doesn’t show signs of recovery after 4-6 weeks, it might be too far gone. In that case, focus on the mother plant—healthy aloe leaves will sprout new pups that you can replant. Don’t give up! Even if one leaf doesn’t make it, your aloe plant will keep producing fresh ones.
Tips & tricks for reviving aloe leaves
Here's what nobody tells you about saving those crispy-edged aloe leaves—these tricks make all the difference.
Trim with Precision: When you're cutting those brown edges in Step 1, look for the transition point where healthy green meets brown. This is your stopping point—cutting too deep into healthy tissue weakens the leaf. I like to make small test snips first to see where the healthy tissue begins. This careful approach prevents unnecessary damage while removing all the dead parts.
Speed Up Callusing (Optional): The 24-hour isolation period in Step 2 is perfect for most situations, but if you're really eager to replant, you can dust the trimmed ends with a tiny pinch of cinnamon powder. This antifungal trick helps the cuts heal faster—just be gentle, as too much can irritate the leaf. The powder creates a protective barrier that keeps bacteria at bay while the leaf prepares for replanting.
Soil Mix Matters: While you can use straight cactus/succulent mix in Step 3, adding perlite creates better drainage that prevents rot. I mix them 50/50 for the best results. The perlite helps air circulate around the base of your leaf, which is crucial for preventing moisture buildup. If you don't have perlite, coarse sand works in a pinch—just make sure it's clean and sterile.
Light Transition Strategy: That first week of bright, indirect light in Step 4 is critical. I place my recovering leaves near an east-facing window where they get gentle morning sun without the harsh afternoon rays. After a week, I gradually move them to slightly sunnier spots over 3-4 days. This slow adjustment prevents sunburn on leaves that are still recovering their resilience.
Pro Tips for Save An Aloe Leaf
- Here's what nobody tells you about saving those crispy-edged aloe leaves—these tricks make all the difference.
- Trim with Precision: When you're cutting those brown edges in Step 1, look for the transition point where healthy gre...
- Speed Up Callusing (Optional): The 24-hour isolation period in Step 2 is perfect for most situations, but if you're r...
Frequently asked questions
Got questions about saving your aloe leaf? Here are some of the most common ones—and their answers!
Why are the edges of my aloe leaf turning brown?
The most common causes are overwatering or underwatering. Aloe plants store water in their leaves, so too much moisture causes rot, while too little leads to dehydration and browning. Check the soil—it should be completely dry before watering again. If the browning is severe, trim the damaged edges and adjust your watering schedule.
How long does it take for an aloe leaf to recover?
With proper care, you’ll often see improvement within 24–48 hours. If the leaf is only slightly browned, it may fully recover in a week. For severely damaged leaves, focus on reviving the plant first—healthy roots and soil will help new growth sprout. Be patient, and avoid touching or pruning until you’re sure the leaf is stable!
Can I save an aloe leaf that’s already mushy or rotting?
If the leaf feels soft, squishy, or emits a foul odor, it’s likely too far gone to save. However, you can still save the plant by removing the affected leaf (use clean scissors or a knife) and repotting the healthy base in fresh, well-draining soil. Prevent future rot by ensuring the pot has drainage holes and avoiding soggy conditions.
What can I do with a damaged aloe leaf that won’t recover?
Don’t toss it! Use the gel inside for skincare, burns, or even homemade aloe vera juice. Cut off the damaged edges, scoop out the gel with a spoon, and store it in the fridge for up to a week. You can also propagate new plants from healthy aloe cuttings—just let the trimmed leaf dry for a day before planting it in soil.
Can cold weather cause browning, and how do I fix it?
Yes! Aloe plants are tropical and struggle in temperatures below 50°F (10°C). If your plant was exposed to cold drafts or chilly nights, move it to a warmer, sunny spot immediately. Brown edges from cold stress may not fully reverse, but new growth should thrive if conditions improve. Avoid placing aloe near windows or doors that get drafty.
Wrapping up and next steps
Saving an aloe leaf with brown edges is simpler than you think! By trimming the damaged parts, adjusting watering habits, and providing the right environment, you can revive your plant in just 24 hours.
Remember, aloe thrives on patience and consistency—don’t overwater, and soon you’ll see those crispy edges fade away. 🌱
Now that you’re equipped with the know-how, why not share this tip with a fellow plant lover? Or, if your aloe’s looking extra lush, it might be time to propagate it and expand your green family! 🌟