Pests and Diseases
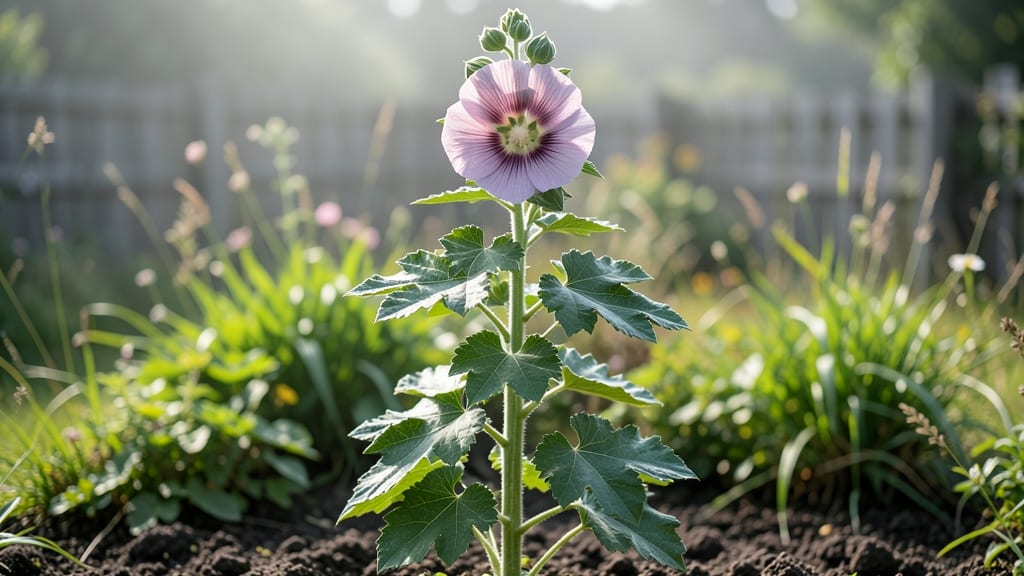
Mastering hollyhock leaf identification is your first line of defense against fungal spots that can devastate your plants. 🌿 Those deep green, heart-shaped leaves with jagged edges are your baseline—but watch for anything that looks like fuzzy white powder or rust-colored splotches.
I’ve seen healthy hollyhocks turn into sad, spotted messes in just a few weeks, and the key to saving them is knowing what’s normal and what’s not.
Healthy leaves should feel slightly rough to the touch, with visible veins that fade into the green. When powdery mildew hits, those leaves turn chalky white, and rust shows up as orange pustules on the undersides.
The moment you see these, act fast—prune infected leaves immediately and space plants for better airflow. I’ve learned the hard way that ignoring early signs leads to a season of struggling blooms.
Here’s the game-changer: compare your leaves to photos of both healthy and diseased hollyhocks. Rust and mildew start small but spread quickly, so don’t wait until the whole plant looks sad.
A simple spray of neem oil or baking soda mix can stop mild infections, but severe cases might need fungicides. The goal is to keep your plants thriving—not just surviving.
This works for gardeners at any level, whether you’re dealing with a single bush or a whole border. The sooner you spot the problem, the easier it is to fix. Let’s get those leaves looking strong again!
Understanding Leaf Markings
Hollyhock leaves can develop mysterious spots, discoloration, or unusual patterns that make proper leaf identification tricky. These changes aren’t random—they’re often a plant’s way of signaling stress, disease, or pest activity. Below, we break down the most common causes behind these leaf issues, explained in clear, actionable terms.
Fungal diseases are the #1 culprit behind hollyhock leaf markings, especially in humid or damp conditions. These pathogens thrive when spores land on leaves and find the perfect environment to grow.
- How it happens:
- Spores from fungi like Alternaria or Cercospora (common hollyhock foes) land on leaves during rain, wind, or even from infected plant debris.
- Warm, moist conditions (60–80°F with high humidity) trigger germination, allowing the fungus to penetrate leaf tissue.
- The plant’s immune system reacts by forming dark, water-soaked spots—often with concentric rings or yellow halos.
- Actionable clues:
- Look for target-like spots (dark centers with lighter borders) or irregular brown patches that spread rapidly.
- Check the underside of leaves for fuzzy or powdery growth—this is a dead giveaway for fungal activity.
- Morning dew or overhead watering? That’s fungal fuel. 💦
- Prevention tip: 🌡️ Space plants for airflow, water at the base (not leaves), and remove infected foliage immediately to stop spore spread.
Insects like aphids, spider mites, and hollyhock borers don’t just munch leaves—they leave behind distinctive markings that help with identification. Their feeding habits weaken the plant, making it more susceptible to disease.
- How it happens:
- Sap-sucking pests (e.g., aphids) inject toxins while feeding, causing yellow stippling or curling along leaf veins.
- Spider mites create fine webbing and tiny white/yellow speckles (like pepper sprinkled on leaves).
- Caterpillars or borers chew irregular holes, often near leaf edges or stems.
- Actionable clues:
- Inspect leaf undersides for tiny insects, eggs, or webs.
- Notice silver-gray trails (slime from slugs) or ragged edges (cutworms).
- Shake plants over a white tray—falling pests confirm infestations. 🕷️
- Pro tip: 🎯 Use a strong stream of water to dislodge soft-bodied pests (aphids, mites) or apply neem oil for long-term control.
Hollyhocks are hardy, but extreme weather, poor soil, or light issues can trigger leaf abnormalities that mimic disease. These problems often start subtly and worsen without proper care.
- How it happens:
- Too much sun: Leaves scorch (brown, crispy edges) or develop bleached patches from UV damage.
- Too little sun: Leaves grow pale, spindly, and yellow between veins (chlorosis).
- Nutrient deficiencies:
- Nitrogen deficiency: Pale yellow leaves with dark veins.
- Magnesium deficiency: Interveinal yellowing (common in alkaline soils).
- Iron deficiency: New leaves stay white or yellow.
- Water issues:
- Overwatering: Yellowing, mushy leaves (root rot risk).
- Underwatering: Dry, brittle edges and wilting.
- Actionable clues:
- Check soil moisture with your finger—top 1–2 inches should be dry before watering.
- Test soil pH (ideal: 6.0–7.0 for hollyhocks). High pH? Amend with sulfur or peat moss.
- Move plants to partial shade if leaves show sunburn (common in hot afternoons).
- Quick fix: 💡 Fertilize with a balanced 10-10-10 or foliar spray with chelated iron if deficiencies are suspected.
By recognizing these patterns early, you can correct the root cause before hollyhock leaf issues spiral. Next, we’ll cover how to diagnose specific symptoms with confidence!
Fixing Hollyhock Leaf Issues Fast
Hollyhock leaves can develop unsightly spots, discoloration, or other signs of distress—but the good news is most problems have simple, effective fixes. Below, we’ve broken down the most common issues by cause and provided step-by-step solutions to restore your plants to health.
Prevention tips are included to keep your hollyhocks thriving long-term!
If your hollyhock leaves show dark, circular spots with yellow halos, fungal infections like Alternaria or Cercospora are likely to blame. These thrive in warm, humid conditions, so quick action is key.
#### ✅ Step-by-Step Fix 1. 🔥 Remove Infected Leaves - Snip off severely spotted leaves with clean pruners (sterilize with rubbing alcohol between cuts). - Dispose of them in the trash—not the compost—to prevent reinfection. 2. 🌧️ Improve Airflow & Reduce Moisture - Space plants 18–24 inches apart to allow airflow. - Water at the base (not overhead) in the early morning so leaves dry quickly. 3. 💊 Apply Fungicide - Use a copper-based fungicide (like Cupric Hydroxide) or a neem oil spray (1 tsp neem oil + 1 tsp mild soap per quart of water). - Spray both the tops and undersides of leaves every 7–10 days until new growth appears. 4. 🌱 Boost Plant Immunity - Feed with a balanced fertilizer (10-10-10) to strengthen foliage. - Add compost or well-rotted manure to improve soil health. #### 💡 Prevention Tips - 🌡️ Avoid overhead watering—stick to drip irrigation or soaker hoses. - ✨ Mulch properly—use 2–3 inches of organic mulch (like straw) to keep soil moist but not soggy. - 🌿 Rotate crops—don’t plant hollyhocks in the same spot year after year.Holes, chewed edges, or sticky residue (honeydew) on leaves? Pests are likely the culprits. Hollyhocks are magnets for hungry insects, but they’re easy to manage.
#### ✅ Step-by-Step Fix 1. 👨🍳 Handpick or Blast Off Pests - Aphids/Japanese beetles: Spray with a strong stream of water to knock them off. - Spider mites: Wipe leaves with a damp cloth or rinse under water. 2. 🔪 Introduce Beneficial Insects - Release ladybugs (for aphids) or parasitic wasps (for beetles) from a garden center. - Plant marigolds or dill nearby to attract natural predators. 3. 🍳 Use Organic Sprays - Neem oil spray (repeat every 5–7 days). - Soap spray (1 tbsp horticultural oil + 1 tsp castile soap per quart of water). - Kaolin clay (like Surround WP) creates a protective barrier. 4. 🌿 Prune & Dispose of Heavy Damage - Trim back heavily infested stems to encourage new growth. #### 💡 Prevention Tips - 🎯 Install row covers early in the season to block beetles and mites. - 🌿 Plant pest-repelling companions like garlic, chives, or thyme nearby. - 🌡️ Monitor regularly—check undersides of leaves weekly for early signs.If leaves turn yellow between veins (chlorosis) or stay small and pale, your hollyhocks may be hungry—especially for iron, magnesium, or nitrogen.
#### ✅ Step-by-Step Fix 1. 📊 Test Your Soil - Use a DIY soil test kit (available at garden centers) to identify deficiencies. - Hollyhocks prefer slightly acidic to neutral soil (pH 6.0–7.0). 2. 💪 Apply Targeted Fertilizers - Iron deficiency (yellow leaves): Sprinkle iron sulfate or use a chelated iron spray. - Magnesium deficiency (yellow patches): Work Epsom salt (1 tbsp per gallon of water) into the soil. - Nitrogen deficiency (pale stems): Use a balanced fertilizer (10-10-10) or compost tea. 3. 🌱 Improve Soil Structure - Amend heavy clay soil with sand or perlite to prevent compaction. - Add well-aged compost for a slow-release nutrient boost. #### 💡 Prevention Tips - 🌿 Mulch annually to retain moisture and nutrients. - 🍎 Avoid over-fertilizing—hollyhocks prefer leaner soil over time. - 🌡️ Water deeply but infrequently to encourage deep root growth.With these targeted fixes, your hollyhocks should bounce back in no time. The key is early action—catch problems before they spread, and your plants will reward you with vibrant blooms all season! For persistent issues, consider consulting a local extension service for tailored advice.
Frequently asked questions
How do I tell the difference between healthy hollyhock leaves and those with early fungal spots?
Healthy hollyhock leaves are deep green, slightly rough to the touch, and have jagged edges with visible veins. Early fungal spots appear as small dark circles with yellow halos or powdery white patches on the undersides. Check for these key differences: healthy leaves stay firm, while infected ones may feel soft or develop fuzzy growth.
What do rust-colored spots on hollyhock leaves actually mean?
Rust-colored spots are a classic sign of rust fungus, caused by spores landing on leaves. These spots often appear on the undersides of leaves as orange pustules that burst open. If you see these, prune infected leaves immediately and improve airflow around your plants. Rust spreads quickly in damp conditions, so act fast!
Can I still save my hollyhocks if the leaves are already heavily spotted?
Yes, but you’ll need to act quickly! Remove all infected leaves with clean pruners and dispose of them in the trash (not compost). Then apply a copper fungicide or neem oil spray every 7-10 days. For severe cases, consider removing the entire plant and treating the soil with a fungicide to prevent reinfection. Prevention is key—next season, space plants for better airflow!
Why do some hollyhock leaves turn yellow between the veins?
This is often a sign of iron or magnesium deficiency, especially in alkaline soils. Test your soil pH (ideal: 6.0–7.0) and amend with Epsom salt (magnesium) or chelated iron if needed. Yellowing between veins is different from overall yellowing—it’s a clear nutrient signal, not just poor health.
How often should I inspect my hollyhock leaves for problems?
Check your hollyhock leaves weekly during the growing season, focusing on the undersides where pests and fungal spores love to hide. Early detection is critical—catch issues when leaves show just a few spots, not when the whole plant looks sad. Morning inspections work best when leaves are dry.