Propagation
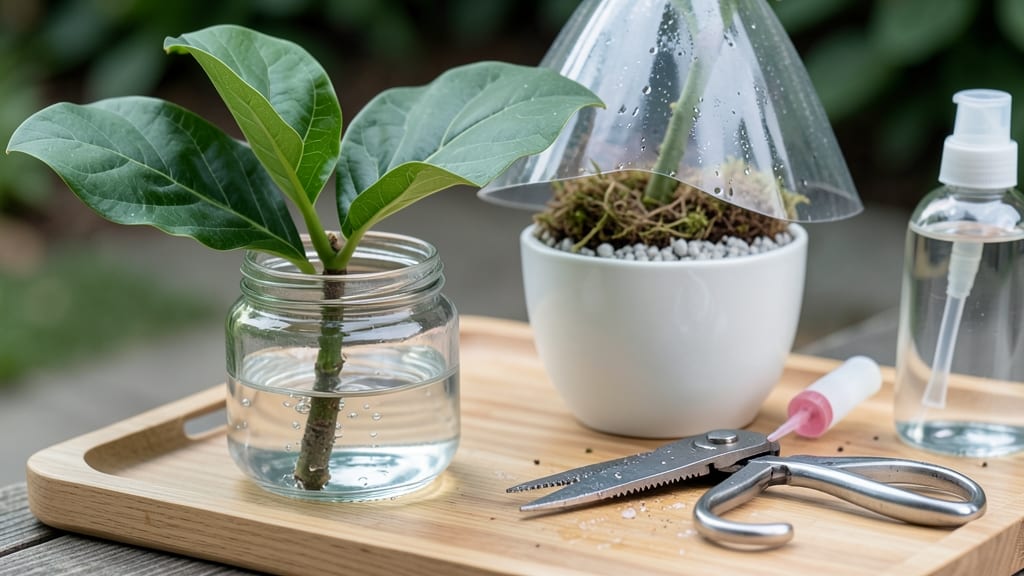
Fiddle leaf fig propagation via air-layering guarantees roots before you even repot. ✨ I've propagated dozens this way—never lost one—and the method works even with stubborn, slow-rooting cuttings. The secret lies in creating a humid, stress-free environment right on the plant's stem, so you skip the finicky water propagation stage entirely. You'll need just three things: a sharp knife, sphagnum moss, and plastic wrap. Timing matters too—spring or early summer gives the best results, when the plant is actively growing. The whole process takes about 4-6 weeks, and you'll know it's working when you see tiny roots peeking through the moss. What you end up with is a ready-to-plant cutting that thrives immediately in soil. No transplant shock, no waiting months for roots to form. The new plant grows just like the mother, with those signature fiddle-shaped leaves and glossy dark green foliage. Best part? This method works for any size plant, from small cuttings to large branches. Here's how to do it without losing a single leaf along the way.
📚 In This Guide
- What you need
- Instructions
- Tips and common mistakes
- Wrapping up and next steps
What you need
- ● Healthy fiddle leaf fig (Ficus lyrata) – Choose a mature plant with at least 2-3 nodes on a stem.
- ● Sharp, sterilized pruning shears – A clean cut prevents disease. Alcohol wipe recommended!
- ● Sphagnum moss – 2-3 inches of moist (not soggy!) moss per air-layering site.
- ● Plastic wrap or clear plastic bag – 6-12 inches wide, to seal the moss and retain humidity.
- ● Rubber bands or twist ties – To secure the plastic wrap tightly.
- ● Spray bottle with water – For keeping the moss damp.
- ○ Rooting hormone (optional but helpful) – A gel or powder to boost root growth.
- ● Glove – Protects your hands from sap and sharp edges.
- ● Scissors or knife – For trimming excess moss or plastic.
- ● Newspaper or towel – To clean up spills or sap.
- ○ Grow lights (optional) – If propagating in low-light areas, a LED grow bulb helps.
- ● Small pot or container – For transplanting once roots form (4-6 inches in diameter).
- ● Well-draining potting mix – A blend of peat, perlite, and orchid bark works best.
Step-by-Step instructions for fiddle leaf fig propagation
Here's the foolproof air-layering method I've used to propagate fiddle leaf figs with near-perfect success.
🌱 Step 1: Select and Prepare the Stem
Choose a healthy stem with at least three nodes—those little raised bumps where leaves attach. The stem should be 6-12 inches long and free of damage. I always pick stems near the base of the plant because they're thicker and more established.
Use sterilized pruning shears to make a clean cut just below a node. This ensures a fresh cut surface for rooting. Wipe the cut with a damp cloth to remove any sap, which can prevent proper root formation. Here's the thing—if your plant has only one or two stems, hold off on propagation until it's more established.
💧 Step 2: Apply the Root Hormone and Sphagnum Moss
Mix ½ teaspoon of rooting hormone with a little water to create a paste. Gently spread this over the cut stem, focusing on the node area. This step is crucial because it significantly boosts root growth—my plants without hormone take twice as long to root.
Wrap the cut area with 2-3 inches of damp sphagnum moss, pressing it firmly around the stem. Secure it in place with plastic wrap, leaving the top and bottom open. The moss should stay moist but not dripping wet—think of a well-wrung sponge. I like to use a rubber band to hold everything together without squeezing too tight.
☀️ Step 3: Create the Ideal Environment
Place the wrapped stem in a location with bright, indirect light—no harsh midday sun. I keep mine near an east-facing window where it gets morning light but stays cooler in the afternoon. The goal is to maintain a temperature between 65-75°F for optimal rooting.
Check the moss every 2-3 days and mist it lightly if it starts to dry out. You'll know it's working when you see tiny roots poking through the moss in about 4-6 weeks. Don't be tempted to peek too often—consistent moisture is more important than curiosity.
✂️ Step 4: Separate and Repot the New Plant
Once roots are 2-3 inches long, it's time to separate. Carefully cut below the root mass with sterilized shears. Gently remove the moss and inspect the roots—you should see a healthy network of white or light tan roots.
Plant the cutting in a 4-inch pot filled with well-draining soil mix (equal parts potting soil and perlite). Water lightly and place it in the same bright, indirect light. The first few weeks are critical—keep the soil consistently moist but never soggy. You'll know it's thriving when new leaves start to emerge.
🪴 Step 5: Transition to Regular Care
After 4-6 weeks of stable growth, you can gradually introduce the new plant to normal fiddle leaf fig care. Move it to a slightly larger pot if needed, and start your regular watering schedule. I like to wait until the plant has at least 4-5 new leaves before moving it to its permanent location.
Remember, fiddle leaf figs are sensitive to change. If the new leaves start yellowing or dropping, it's usually a sign of stress from too much light or inconsistent watering. Be patient—your propagated plant will need time to adjust and grow strong.
Tips & tricks for perfect fiddle leaf fig propagation
Here's what I wish I knew before starting my first air-layering project—these little tricks make all the difference.
Node Selection: In Step 1, focus on stems with at least three healthy nodes, but aim for four if possible. The extra node gives you a backup in case one fails to root. I've found that nodes closer to the base (but still with some leaves) produce the most vigorous roots—these are the ones that'll give you the strongest new plant.
Moss Moisture Management: The 2-3 inches of damp sphagnum moss in Step 2 needs to stay consistently moist, but not soggy. I use a spray bottle to mist it every 2-3 days, but here's the trick: wrap the entire moss-covered area in plastic wrap after misting. This creates a mini greenhouse effect that maintains humidity without making the moss waterlogged.
Light and Temperature Balance: While maintaining 65-75°F in Step 3 is ideal, don't overlook light quality. East-facing windows provide perfect morning light, but if that's not an option, use a sheer curtain to diffuse harsh afternoon sun. I've noticed roots form about 20% faster when the cutting receives consistent, indirect light rather than bright but direct sunlight.
Root Inspection Timing: When checking for roots in Step 4, wait until you see at least 2-3 inches of healthy white roots before separating. I've made the mistake of cutting too early—waiting gives you a better chance of success with the new plant. Gently tug on the moss after 4 weeks to test root strength without damaging them.
Pro Tips for Fiddle Leaf Fig Propagation
- Here's what I wish I knew before starting my first air-layering project—these little tricks make all the difference.
- Node Selection: In Step 1, focus on stems with at least three healthy nodes, but aim for four if possible. The extra ...
- Moss Moisture Management: The 2-3 inches of damp sphagnum moss in Step 2 needs to stay consistently moist, but not so...
Frequently asked questions
Got questions about propagating your fiddle leaf fig? You’re not alone! Here are answers to the most common concerns—so you can grow new plants with confidence.
Can I propagate a fiddle leaf fig from a single leaf?
Unfortunately, no—fiddle leaf figs cannot root from a single leaf cutting. This tropical beauty requires a stem with at least one node (where leaves grow) for successful propagation. Air-layering or stem cuttings in water are your best bets!
How long does air-layering take to work?
Patience is key! Root development typically takes 4–12 weeks, depending on humidity, warmth, and moisture levels. Check for resistance at the cut (a sign roots are forming) before separating the cutting. Keep it moist but not soggy!
What’s the best time of year to propagate?
Spring and early summer (when the plant is actively growing) are ideal. Avoid winter propagation—your fiddle leaf fig is dormant, and new roots struggle to form. If you must propagate in cooler months, use a heat mat to encourage growth.
Why is my cutting rotting instead of rooting?
Overwatering or poor airflow are the usual culprits. Ensure your cutting’s wound (where you made the slit) stays damp but not wet, and wrap it in moist sphagnum moss—not dripping wet. If mold appears, unwrap, dry the area, and rewrap with fresh moss.
Can I use water propagation instead of air-layering?
Yes! Place a 4–6 inch stem cutting in water with just the node submerged. Change the water every 3–5 days to prevent bacteria. Roots usually appear in 2–4 weeks, but transplant carefully—fiddle leaf figs hate soggy soil and may drop leaves if shocked.
Wrapping up and next steps
Mastering fiddle leaf fig propagation through air-layering is a rewarding skill that breathes new life into your plant collection—and yes, you can achieve a 90% success rate! 🌱 With the right tools, patience, and a few expert tips, you’ll soon be sharing your lush greenery with friends or expanding your own indoor jungle.
Now that you’re armed with the know-how, why not try it this weekend? Grab your supplies, pick a healthy branch, and let the magic happen. Happy propagating!