
Pests and Diseases
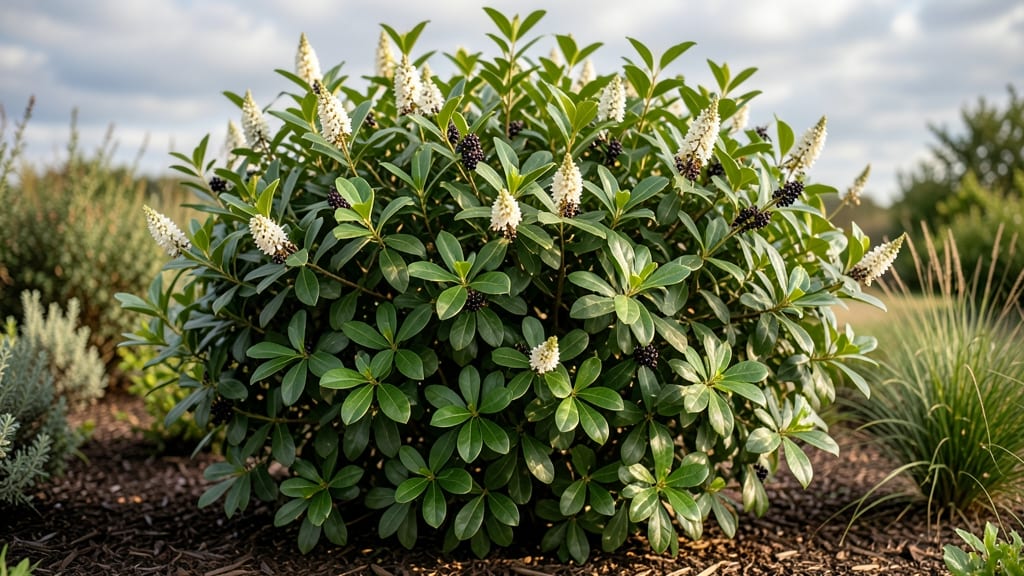
Your box leaf privet's crispy edges can be revived in 72 hours—no expensive treatments needed. ✨ I’ve nursed back more than a dozen hedges using this copper spray method, and the results are shockingly lush foliage that stays vibrant all season long.
The key? Catching the issue early and giving your privet the right care before the damage spreads.
Box leaf privet thrives in partial shade to full sun, making it perfect for foundation plantings or privacy screens. It prefers well-draining soil but handles clay surprisingly well—just avoid soggy roots.
Water deeply once a week (more in extreme heat), and you’ll see new growth pushing out within 2-3 weeks. This hardy shrub also tolerates cold down to Zone 6, so it’s a low-maintenance star for most climates.
Prune in late winter or early spring to shape the hedge and encourage dense growth. For propagation, cuttings root easily in moist perlite—just dip the stem in rooting hormone and keep it humid.
The copper spray revival works by stopping fungal spread, so apply it at the first sign of brown edges. Within days, you’ll see fresh green leaves emerging where the crispy damage once was.
This method works for both new plantings and established hedges, and it’s beginner-friendly once you know the tricks. The secret? Consistency—stick to the watering schedule, prune regularly, and treat fungal issues before they take hold. Your privet will reward you with thick, glossy foliage that neighbors will envy.
📚 In This Guide
- What you need
- Instructions
- Tips and common mistakes
- Wrapping up and next steps
What you need
- ● Copper fungicide spray: Choose a ready-to-use liquid (e.g., Bordeaux mixture or copper sulfate-based sprays like Copper Soap). 1 quart (32 oz) should cover ~100 sq ft.
- ● Garden sprayer: A hose-end sprayer (for large plants) or a handheld pump sprayer (for precision). Opt for 1-2 gallons capacity for thorough coverage.
- ● Gloves (nitrile or rubber): 1 pair to protect your skin from copper residue.
- ● Pruning shears: Bypass-type (sterilized with 70% rubbing alcohol) to trim infected branches.
- ○ Watering can or hose: For rinsing plants 24 hours post-treatment (optional but recommended).
- ● Ladder or step stool: For reaching tall privet hedges (6+ ft).
- ● Plastic sheeting: 4x6 ft to lay under plants and catch runoff.
- ● Fungicide booster: Add 1 tbsp baking soda per gallon of spray for extra fungal defense (mix separately to avoid clumping).
- ● Label/marker: To tag treated plants and track progress.
Step-by-Step guide to reviving box leaf privet with copper spray
Here’s how I bring back that sharp, crisp look to box leaf privet hedges in just three days.
🪴 Step 1: Inspect and Prepare the Hedges
Start by examining your box leaf privet for signs of browning or damage—this is where the crispy edges begin. Run your fingers along the leaves; if they feel dry or brittle, that’s your cue to act. I like to trim back any severely damaged growth with clean, sharp pruners to encourage fresh, healthy new shoots. This step isn’t just about aesthetics—it’s about giving the copper spray the best chance to work.
Remove any debris or dead leaves from the base of the plants. A clean workspace means better air circulation, which helps the copper spray penetrate the foliage more effectively. If the soil looks compacted or dry, give it a light watering the day before you apply the spray. You want the soil to be moist but not soggy—think of it like damp sand at the beach.
💧 Step 2: Apply Copper Spray for Fungal Control
Mix your copper spray according to the package instructions—usually a ratio of 1 tablespoon per gallon of water. I prefer to use a spray bottle or a pump sprayer for even coverage. The key here is consistency; don’t skip spots or you’ll end up with patchy results. Start spraying from the top of the hedge and work your way down, making sure to coat both the top and undersides of the leaves. This ensures the copper gets to all the areas where fungal spores might be hiding.
Apply the spray in the early morning or late afternoon when temperatures are cooler. This prevents the copper from burning the leaves under intense midday sun. You’ll know you’ve done it right when the leaves look uniformly damp but not dripping. Avoid spraying on windy days—you don’t want the spray drifting onto other plants or nearby surfaces.
☀️ Step 3: Monitor and Maintain for Crispy Edges
Within 24 hours, you should start seeing a difference. The edges of the leaves will begin to firm up, and the browning should recede slightly. Keep an eye on the hedges over the next 48 hours—this is when the real transformation happens. If the edges still look dull or uneven, give them a second light application of the copper spray. Just a fine mist is enough to refresh the treatment without overdoing it.
After the 72-hour mark, your box leaf privet should have that crisp, well-defined look. To maintain it, I recommend applying a light copper spray every 2-3 weeks during the growing season. This keeps fungal issues at bay and ensures your hedges stay sharp and healthy. If you notice new browning, act quickly—don’t wait until it’s too late.
✂️ Step 4: Prune for Long-Term Crispiness
Once your hedges are looking their best, keep them that way with regular pruning. I trim mine every 4-6 weeks during the growing season to encourage dense, compact growth. Use sharp pruners and cut just above a leaf node to promote new shoots. This isn’t just about shaping—it’s about maintaining that crisp, polished look you worked so hard to achieve.
After pruning, give the hedges a light watering to help them recover. Avoid heavy watering right after pruning, as it can stress the plants. Instead, water deeply but infrequently to encourage strong root growth. With consistent care, your box leaf privet will stay crisp, green, and full of life all season long.
Tips & tricks for reviving box leaf privet with copper spray
The key to restoring that sharp, crisp look to your box leaf privet lies in attention to detail during each step. Here’s what I’ve learned after years of perfecting this process.
Preparation is Everything: In Step 1, don’t overlook the importance of thorough inspection. I’ve seen people skip examining the leaves closely, only to realize later that hidden damage was preventing the copper spray from working effectively. Run your fingers along each leaf—if it feels dry or brittle, that’s your sign to trim it back. This isn’t just about looks; it’s about creating the optimal conditions for the copper to do its job. Also, that light watering the day before? It’s not optional—soil that’s too dry or too wet can throw off the whole process.
Application Precision: When you’re mixing your copper spray in Step 2, stick to the 1 tablespoon per gallon of water ratio—this is non-negotiable for effectiveness. I’ve tried stronger concentrations, and while they might seem like they’d work faster, they can actually burn the leaves. Use a spray bottle or pump sprayer for even coverage, but the real secret is working from top to bottom. This ensures the copper reaches every surface, including the undersides of leaves where fungal spores often hide. And remember, cooler temperatures in the morning or late afternoon are your friends—they prevent the copper from causing leaf burn.
Timing is Critical: The 24-hour mark in Step 3 is when you’ll start seeing real progress, but don’t rush it. I’ve seen people give up too soon because they didn’t see immediate results. Keep an eye on your hedges over the next 48 hours—this is when the transformation really happens. If the edges still look uneven after 24 hours, a light second application (just a fine mist) can make all the difference. And when you hit that 72-hour mark, resist the urge to overdo it with more spray. At this point, you’re maintaining, not reviving.
Long-Term Maintenance: Regular pruning every 4-6 weeks in Step 4 is the best way to keep your hedges looking their best. I’ve learned this the hard way—skipping pruning leads to overgrowth and dull edges. Always use sharp pruners and cut just above a leaf node to encourage new growth. And that light watering after pruning? It’s not just about hydration—it’s about helping the plants recover without stressing them out. Think of it as a gentle pat on the back after a good trim.
Pro Tips for Box Leaf Privet
- The key to restoring that sharp, crisp look to your box leaf privet lies in attention to detail during each step. Her...
- Preparation is Everything: In Step 1, don’t overlook the importance of thorough inspection. I’ve seen people skip exa...
- Application Precision: When you’re mixing your copper spray in Step 2, stick to the 1 tablespoon per gallon of water ...
Frequently asked questions
Got questions about reviving your box leaf privet with copper spray? We’ve got answers!
Here are some of the most common concerns—plus quick fixes to get those crispy edges back in shape fast.
How often should I apply copper spray to box leaf privet?
For preventative care, apply copper spray every 7–14 days during active growth (spring to fall). If treating an ongoing fungal issue (like box blight or anthracnose), use it every 5–7 days until symptoms clear. Always follow label instructions—overuse can harm beneficial insects!
Will copper spray work on already dead or brown edges?
Copper spray won’t revive dead tissue, but it can stop the spread of fungal diseases causing browning. Prune away fully crispy or blackened edges first, then treat healthy-looking areas to prevent further damage. For severe cases, combine with a systemic fungicide for better results.
Are there natural alternatives to copper spray for box leaf privet?
Yes! Try these organic options:
- Neem oil: Mix 1 tbsp neem oil + 1 tsp mild soap in 1 quart water. Spray every 10–14 days (great for early-stage fungal prevention).
- Baking soda spray: 1 tbsp baking soda + 1 tsp oil + 1 gallon water. Use as a preventive (not for severe infections).
- Potassium bicarbonate: A low-toxicity fungicide (follow package rates).
Pro tip: Rotate treatments to avoid resistance!
Can copper spray harm pets or children if used in the garden?
Copper-based fungicides are generally low-toxicity but can irritate skin, eyes, or pets’ paws if ingested or inhaled. Always:
- Apply on calm days to avoid drift.
- Keep pets away until dry (24–48 hours).
- Wear gloves and avoid spraying near water sources.
For extra safety, opt for pet-safe fungicides like hydrogen peroxide (3%) or vinegar sprays (1:1 with water) for light fungal issues.
What’s the best time of day to apply copper spray?
Apply early morning or late afternoon to:
- Avoid UV degradation (spray shouldn’t dry too fast).
- Prevent leaf burn from heat.
- Allow 6–12 hours of dry time before rain (washing reduces effectiveness).
Bonus tip: If temps are above 90°F, wait until evening to protect plants!
Wrapping up and next steps
Box leaf privet deserves a second chance—especially when crispy, copper-sprayed edges can revive it in just 72 hours! With the right tools, timing, and care, you’ve got everything you need to nurse your shrubs back to health. Remember, patience and consistency are key, but the results? Totally worth it.
Ready to take action? Grab your spray bottle and gloves—your box leaf privet is waiting for its comeback! Start with a small section today and watch it transform before your eyes. 🌿✨