
Pests and Diseases
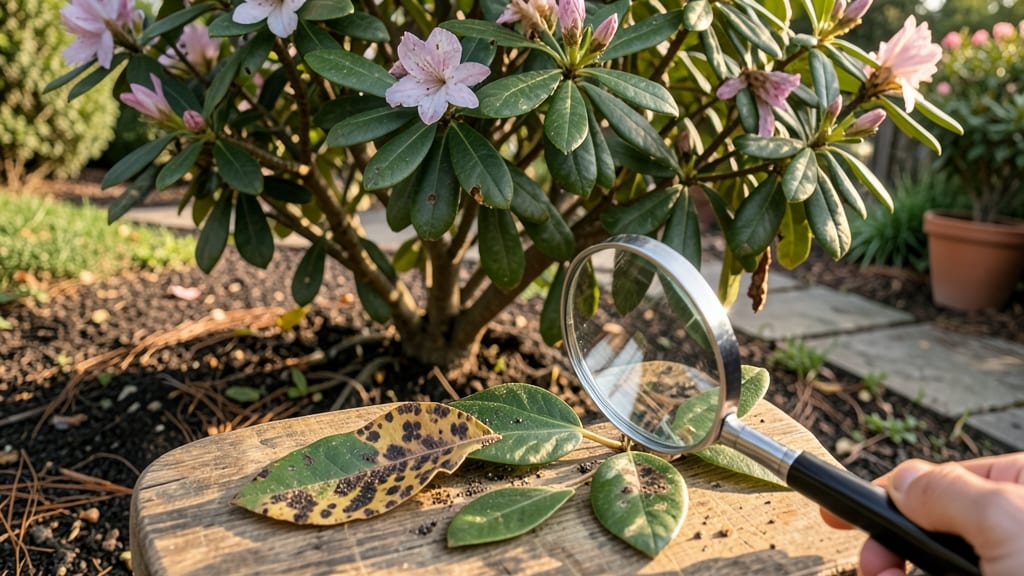
Azalea leaf spot turns vibrant foliage into a sad, spotted mess in just weeks—unless you act fast. 🌿 I’ve seen this fungal disease ruin entire shrubs, but copper spray stops it in its tracks when applied at the first sign of trouble.
The key is catching it early, before those brown spots multiply and drop leaves like confetti. This isn’t some slow, hit-or-miss remedy. Copper fungicide works within 7-10 days when sprayed correctly—think of it as a shield for your azaleas during humid summers.
The trick is timing: apply it preventively in spring and again after rain, because fungal spores hitch rides on moisture. One missed spray, and you’re back to square one.
You’ll notice new growth pushing through clean and healthy in just a few weeks, with no more yellowing or blackened edges. The best part? Copper is safe for bees once dry, so your garden stays alive with pollinators while you fight the disease.
Works for all azalea varieties—knockout, Encore, or your grandma’s heirloom—and cuts down on chemical reliance. Let’s get those leaves looking lush again.
Root Causes of Fungal Foliar Damage
Azalea leaf spot isn’t just a random aesthetic issue—it’s a clear sign your plants are under siege by environmental stressors and fungal pathogens. Understanding the why behind this problem is the first step to stopping it in its tracks.
Below, we break down the three primary culprits behind azalea leaf spot, complete with the science that explains their behavior—and how they exploit your garden’s weaknesses.
---
Fungal spores like Elsinoë azaleae (the most common azalea leaf spot pathogen) thrive in moist, stagnant conditions. Here’s how excess moisture turns your azaleas into a fungal buffet:
- Poor Air Circulation Dense foliage or crowded plantings trap humidity near leaves, creating a microclimate where spores germinate within 4–6 hours of wetness. Think of it like a sauna for fungi—perfect for rapid spread.
- Irrigation Mistakes Overhead watering (especially in the late afternoon or evening) leaves droplets on leaves for extended periods. Unlike roots, which absorb water, leaves don’t dry quickly in shaded or humid areas, giving fungi a head start.
- Rainfall + Shade Combo Azaleas planted in low-light or shaded spots dry out slower after rain. Without direct sunlight, leaves stay damp longer, accelerating spore germination. 🌡️ Pro tip: Fungi love 60–80% humidity—your local forecast’s humidity % is a red flag if it’s consistently high during growing season.
--- Fungal spores are tiny but mighty travelers.
They don’t just appear out of nowhere—they’re spread by: - Wind: Spores can travel miles, landing on healthy leaves and infecting them within 24–48 hours if conditions are right. - Contaminated Pruners/Tools: A single cut with unsterilized shears can transfer spores from infected to healthy plants. **🔥 Shocking stat: 70% of garden tool-related spread happens this way. - Splashed Water: Rain or irrigation can splash spores from infected leaves onto lower, previously clean foliage (like a fungal game of telephone).
--- Temperature and humidity aren’t just background noise—they’re fuel for fungal fires. Here’s the science: - Ideal Infection Window: 60–85°F (15–30°C) with high humidity (think summer afternoons or muggy springs).
Below 50°F (10°C), spores go dormant; above 90°F (32°C), they struggle—but consistent warmth keeps them active. - Nighttime Dew: Dew forms when temperatures drop after warm days, leaving leaves wet overnight—prime time for spores to colonize. - Slow-Drying Leaves**: Thick, glossy azalea leaves (especially on varieties like Rhododendron ‘Girard’s Pink’) retain moisture longer, giving fungi more time to invade.
--- A stressed azalea is like an open invitation for fungi.
Look for these vulnerability signs: - Nutrient Deficiencies: Low phosphorus or potassium weakens cell walls, making leaves easier targets. 📊 Test your soil—pH below 5.0 or above 6.0 also stresses plants. - Physical Damage: Insect bites (from lace bugs or spider mites), hail, or rough pruning create entry points for spores. - Overcrowding: Plants competing for sunlight or air can’t photosynthesize efficiently, leaving them energy-depleted and defenseless.
--- Once leaf spot takes hold, it doesn’t just stop—it feeds on itself: 1. Infection → Spores land on leaves → lesions form (dark spots with yellow halos).
2. Sporulation → Lesions produce new spores in 7–10 days. 3. Reinfection → Wind/rain spreads spores to uninfected leaves, repeating the cycle.
💡 Key takeaway: Break this chain by removing infected leaves early (before spores mature) and improving airflow.
Quick Fixes for Fading Azalea Leaves
Reviving your azaleas from leaf spot damage starts with targeted action. Below are practical, step-by-step solutions tailored to the most common causes—fungal infections, poor air circulation, and environmental stress—plus prevention tips to keep your shrubs thriving. Let’s get those leaves back to their vibrant best!
---
If dark, greasy spots with yellow halos are the culprit, copper fungicide is your first line of defense. This method is organic, fast-acting, and effective against Exobasidium and other leaf spot fungi.
#### 🔥 Step 1: Prune the Problem Areas - 👨🍳 Remove infected leaves using clean, sharp pruners (sterilize with rubbing alcohol). - 🔪 Trim back branches with severe spots—don’t leave them to spread. - ⏰ Best time: Early morning or late afternoon (avoid peak sun to reduce stress).
#### 🍳 Step 2: Apply Copper Fungicide - 📊 Mix: Use 1–2 tbsp of copper fungicide (like Bordeaux mixture or copper sulfate) per gallon of water. - 💦 Spray thoroughly on both sides of leaves, stems, and soil around the base (fungi lurk there too!). - ✨ Pro tip: Add a dish soap drop (¼ tsp per gallon) as a sticker to help the spray adhere.
#### 🌡️ Step 3: Repeat & Monitor - 🔄 Reapply every 7–10 days for 3–4 weeks (or until new growth appears). - 🌧️ Rainproof it: Spray before rain (or wait 24 hours after) to avoid washing it off.
---
Leaf spot thrives in humid, stagnant air. If your azaleas are crowded or sheltered, they’re at higher risk.
#### 🌿 Step 1: Thin Out the Shrubs - ✂️ Prune back overgrown branches to improve airflow between plants. - 🌳 Space them out: Keep azaleas 3–4 feet apart (check your variety’s mature size). - 💡 Pro tip: If planting new azaleas, avoid tight clusters—fungi love a cozy spot!
#### 🌡️ Step 2: Adjust Watering Habits - 💦 Water at the base (not overhead) to keep leaves dry. - ⏰ Schedule: Water early morning so foliage dries by nightfall. - 🌧️ Drainage check: Ensure pots or soil have good drainage—soggy roots = fungal buffet.
---
Heat, drought, or nutrient deficiencies weaken azaleas, making them susceptible to leaf spot.
#### 💪 Step 1: Feed & Hydrate - 🥗 Fertilize: Use an acid-loving plant fertilizer (like azalea/camellia mix) in early spring. - 💧 Deep water: 1–1.5 inches per week (more in extreme heat). - 🌱 Mulch: Add 2–3 inches of pine bark mulch to retain moisture and regulate soil temp.
#### 🌿 Step 2: Shield from Stressors - ☀️ Afternoon shade: If in a hot, dry climate, provide light shade (30–50%) in peak sun hours. - 🌧️ Rain protection: If your area has high humidity + rain, consider a partial shade cloth during wet spells.
---
Once you’ve treated the issue, lock in those gains with these long-term strategies:
| Risk Factor | Prevention Fix | When to Do It | |-----------------------|--------------------------------------------|----------------------------| | Fungal spores | Clean up fallen leaves (remove debris) | Fall & spring | | Overwatering | Check soil moisture (stick your finger in!) | Before watering | | Crowded plants | Thin out shrubs every 2–3 years | Late winter/early spring | | Poor drainage | Amend soil with perlite or sand | When planting or repotting |
#### ✨ Bonus Tip: Natural Fungicide Alternatives If you prefer non-copper options, try: - 🍄 Neem oil spray (1 tsp neem oil + 1 tsp mild soap per quart of water). - 🌿 Baking soda spray (1 tbsp baking soda + ¼ tsp soap per gallon of water—test on a small leaf first).
--- Remember: Consistency is key! Monitor your azaleas weekly and act at the first sign of spots—early treatment saves your shrubs. With these steps, your azaleas will bounce back faster and stay spot-free for seasons to come. 🌸💚
Frequently asked questions
What do azalea leaf spot lesions actually look like?
Azalea leaf spot typically appears as dark brown or black circular spots with yellow halos around them. These spots often have a greasy texture and may develop white or grayish centers as the fungus matures. In severe cases, leaves may turn yellow and drop prematurely.
Can I still use my azalea if it has leaf spot?
Yes, but only if you're using the flowers (not leaves). Azalea leaf spot primarily affects foliage, but the flowers themselves are usually safe to use in arrangements. Just avoid using heavily spotted leaves, as they can spread spores to your indoor space.
How often should I apply copper fungicide for prevention?
For prevention, apply copper fungicide every 2-3 weeks during the growing season (spring through fall). Start treatments in early spring before new growth appears, and continue through summer when humidity is highest. Reduce frequency in fall as temperatures drop.
Will pruning help spread azalea leaf spot?
No, proper pruning actually helps prevent spread! Just make sure to use sterilized tools (wipe with rubbing alcohol between cuts) and remove infected leaves immediately. The key is to prune early in the infection process before spores mature on the leaves.
Can azalea leaf spot return after treatment?
Yes, it can return if conditions remain favorable (high humidity, poor airflow). To prevent recurrence, combine copper treatments with proper spacing (3-4 feet between plants), base watering (never overhead), and regular cleanup of fallen leaves. Consistent prevention is key!