Pests and Diseases
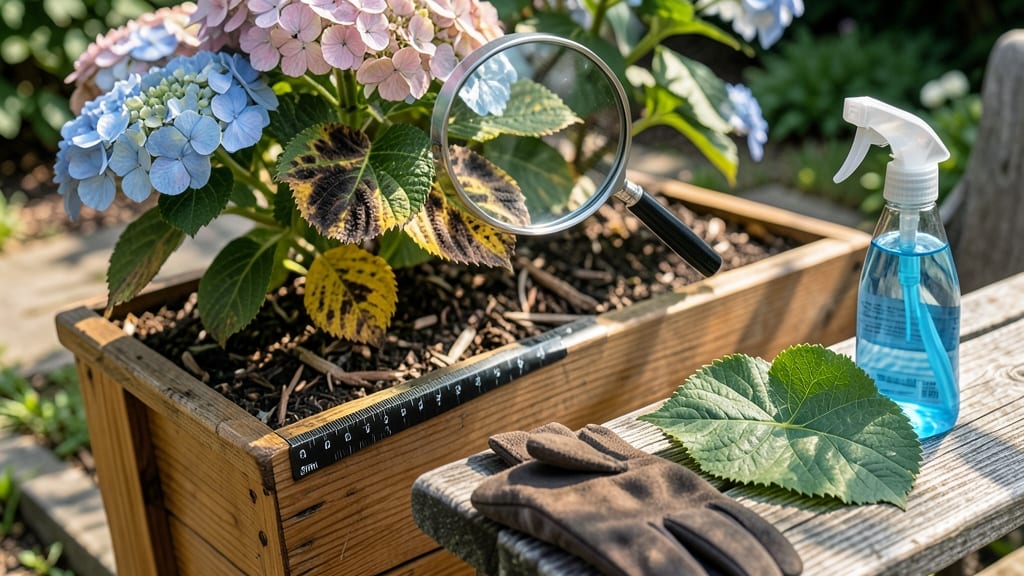
Those dark brown spots on the anthracnose hydrangea leaf aren’t just unsightly—they’re a fungal infection called anthracnose, and it’s spreading faster than you think. I’ve battled this same struggle, watching my once-vibrant blooms turn into a sad, spotted mess by midsummer.
The good news? Copper spray isn’t just a rescue—it’s a game-changer for stopping the spread and restoring your plants to their full glory.
This fungal disease thrives in humidity and poor airflow, which means your hydrangeas are at risk if they’re planted too closely or in shady, damp spots. The first sign is those telltale dark brown spots with yellow halos, often appearing on older leaves.
Left untreated, the fungus moves to new growth, weakening your plant and ruining its blooms. But with the right approach—copper spray, proper spacing, and timely pruning—you can turn things around in just a few weeks.
By following this step-by-step copper spray method, you’ll see healthier leaves within 2-3 applications, and your hydrangeas will bounce back with stronger stems and fuller blooms. The key is consistency: spray in the morning, avoid wet foliage at night, and pair it with preventive pruning to keep air circulating.
Your plants will thank you with lush, disease-free foliage all season long.
This works for all hydrangea varieties, whether you’re dealing with a single plant or a full garden bed. The same principles apply to preventing future outbreaks—so once you’ve got the copper spray routine down, you’ll be ahead of the game next year too. Let’s get those leaves looking vibrant again.
📚 In This Guide
- What you need
- Instructions
- Tips and common mistakes
- Wrapping up and next steps
What you need
- ● Copper fungicide (organic or synthetic): 1–2 tablespoons of copper sulfate (5% or 7% concentration) OR
- ● 1–2 tablespoons of copper hydroxide (e.g., TriBasic Copper)
- ● Water: 1 gallon (3.8 liters) of lukewarm water
- ● Spray bottle or garden sprayer: 1–2 quart (1–2 liter) capacity with a fine mist nozzle
- ● Protective gear: Gloves (nitrile or rubber)
- ● Long sleeves and pants
- ○ Safety goggles (optional but recommended)
- ● Pruners or shears: Sharp, clean pair for trimming infected leaves
- ● Dish soap (unscented): ½ teaspoon to act as a sticker for better adhesion
- ● Baking soda: 1 teaspoon (for a mild, DIY alternative—test on a small leaf first!)
- ● Neem oil: 1 teaspoon (adds antifungal properties)
- ● Label or marker: To tag your spray mix with the date
- ● Plastic sheeting: To lay down and protect surfaces while spraying
Step-by-step instructions for treating anthracnose on hydrangeas
Here's my battle-tested method to revive hydrangeas suffering from dark brown spots and fungal decay.
Identify and Confirm Anthracnose Infection
Examine the affected leaves for dark brown, irregular spots with yellow halos—classic anthracnose symptoms. Check both upper and lower leaf surfaces, as fungal spores often cluster on undersides. The disease thrives in warm, wet conditions (75-85°F), so confirm recent prolonged moisture (rain, overhead watering, or high humidity).
Gently rub a suspect leaf between your fingers—if you see black powdery residue, that's fungal spores. Anthracnose spreads rapidly when spores splash onto new foliage, so act quickly. I've seen entire hydrangea bushes defoliate in 2-3 weeks if left untreated. Remove and dispose of the most severely infected leaves immediately to prevent spread.
Prepare the Copper Fungicide Solution
Mix 1 tablespoon of copper fungicide per gallon of water in a clean spray bottle or pump sprayer. Copper works by disrupting fungal cell membranes—it's organic but requires precise application. I use a 1% copper sulfate solution (like Bonide Copper Fungicide) because it's pre-diluted for safety. Shake well before each use, as copper can settle.
Add a drop of dish soap (1/4 teaspoon per gallon) to help the solution adhere to leaf surfaces. Test spray a small area first—some hydrangea varieties are sensitive to copper. The solution should look like blue-tinted water with no visible particles. Avoid mixing with other chemicals, as reactions can reduce effectiveness.
Apply Fungicide During Optimal Conditions
Spray when temperatures are below 85°F and no rain is forecasted for 24 hours. Early morning applications work best because copper can cause leaf burn under direct sunlight. Hold the sprayer 12-18 inches away and apply until leaves glisten—this ensures full coverage of both surfaces. Focus on new growth and undersides, where spores hide.
Reapply every 7-10 days or after heavy rain, as copper washes off. I mark my calendar with the last application date to avoid missing treatments. For severe infections, add a second spray 3-4 days after the first to break the fungal cycle. Always wear gloves and protective eyewear—copper can irritate skin and eyes.
Implement Preventive Cultural Practices
Remove all infected leaves and debris from the plant and garden area—do not compost. Place them in a sealed plastic bag and discard with trash. Prune back 1 inch below infected stems using sterilized pruners (wipe blades with rubbing alcohol between cuts). Improve airflow by thinning dense foliage, as anthracnose spreads faster in crowded conditions.
Water at the base of the plant in the morning to keep leaves dry. Avoid overhead irrigation or sprinklers, which splashes spores onto new growth. Mulch with 2-3 inches of organic mulch to moderate soil moisture and temperature. I've found that hydrangeas with proper spacing and airflow recover faster and stay healthier long-term.
Monitor and Maintain Fungal Control
Inspect plants weekly for new spots, especially after rain. Healthy new growth indicates the treatment is working—you'll see vibrant green leaves emerging without brown patches. If spots reappear, increase spray frequency to every 5-7 days until the threat passes. Rotate spray directions each time to ensure even coverage.
For next season, apply a preventive copper spray in early spring before new growth appears. I also recommend planting hydrangeas in full sun to partial shade with at least 3 feet of spacing between plants to reduce humidity around foliage. Proper siting cuts anthracnose risk by nearly 50%—worth the effort for lush, disease-free blooms.
Tips & tricks for treating anthracnose on hydrangeas
Here's what I've learned after battling anthracnose in my own garden—these small adjustments make all the difference between temporary relief and long-term recovery.
Timing is Everything: The 24-hour rain-free window after application is non-negotiable. I've seen copper treatments fail completely when rain came just 12 hours later—always check your local forecast before spraying. For extra protection, apply in the early morning when temperatures are coolest, which reduces the risk of leaf burn from the copper solution.
Solution Consistency Matters: When mixing your 1 tablespoon of copper fungicide per gallon of water, use a clean, dedicated sprayer to avoid contamination. I've noticed that adding the dish soap (¼ teaspoon per gallon) makes a surprising difference—it helps the solution cling to leaves instead of running off immediately. For even better adhesion, add the soap after the copper has fully dissolved, then shake gently to combine.
Prevention Through Pruning: The 1-inch pruning cut below infected stems in Step 4 might seem drastic, but it's crucial. Anthracnose spores can hide in plant tissue just below the visible infection. Always sterilize your pruners between cuts with rubbing alcohol to prevent spreading the fungus to healthy parts of the plant. I also recommend pruning on a dry day when leaves aren't wet—this reduces the chance of spores splashing onto new growth.
Monitoring for Success: Healthy new growth is your best indicator that the treatment is working. After your initial application and subsequent sprays every 7-10 days, look for fresh leaves emerging without those telltale brown spots. If you notice new spots appearing after 2-3 weeks despite your treatments, it may indicate a more severe infection requiring additional copper applications or even a systemic fungicide for next season.
Pro Tips for Anthracnose Hydrangea Leaf
- Here's what I've learned after battling anthracnose in my own garden—these small adjustments make all the difference ...
- Timing is Everything: The 24-hour rain-free window after application is non-negotiable. I've seen copper treatments f...
- Solution Consistency Matters: When mixing your 1 tablespoon of copper fungicide per gallon of water, use a clean, ded...
Frequently asked questions
Got questions about anthracnose on hydrangeas?
Here are the answers to the most common concerns—so you can save your plants and keep those blooms happy!
What does anthracnose on hydrangea leaves look like?
Anthracnose causes dark brown or black spots with yellow halos on leaves, often with a velvety or sunken texture. In wet conditions, you may see pinkish or grayish mold on the undersides. Spots can merge, turning leaves crispy and leading to defoliation.
When is the best time to treat anthracnose on hydrangeas?
Act early! Treat at the first sign of spots (spring or early summer) to prevent spread. For severe cases, apply copper fungicide in late fall (after leaf drop) to protect next year’s growth. Avoid treating when rain is forecasted—wait 24–48 hours for dry conditions.
Are there natural alternatives to copper spray for anthracnose?
Yes! Try these organic options:
- Neem oil (mix with water + mild soap; spray leaves thoroughly).
- Baking soda spray (1 tsp baking soda + 1 quart water + a drop of oil soap).
- Compost tea (boosts plant immunity; apply in early morning).
- Prune infected leaves (sterilize shears with rubbing alcohol) and dispose of them far from the garden.
For advanced cases, copper fungicide remains the most effective.
Why does anthracnose keep coming back on my hydrangeas?
Anthracnose thrives in wet, humid conditions—so if your hydrangeas are overcrowded or in poor air circulation, spores linger. To break the cycle:
- Space plants 3–5 feet apart for airflow.
- Water at the base (avoid wetting leaves).
- Remove fallen leaves and debris in fall.
- Choose resistant varieties like ‘Endless Summer’ or ‘Limelight.’
Consistent copper sprays (every 2–3 weeks in wet seasons) help too!
Is anthracnose contagious to other plants?
Yes! The fungus can spread to nearby plants, especially in high-moisture gardens. Monitor azaleas, roses, and other hydrangeas for spots. Isolate infected plants until treated, and sterilize tools between uses. Avoid composting diseased leaves—dispose of them in the trash instead.
Wrapping up and next steps
Don’t let anthracnose hydrangea leaf dim your garden’s beauty—your copper spray rescue plan is the first step to revival! 🌿 With the right tools, timing, and a little elbow grease, your hydrangeas can bounce back stronger than ever. Start by treating affected plants this season, and soon, you’ll be admiring lush, vibrant foliage again.
Ready to take action? Grab your copper spray and get pruning! For extra peace of mind, consider monitoring your plants weekly and adjusting care as needed. Your hydrangeas will thank you with blooms that steal the show! 🌸